It’s a common issue when using a long arm or mid arm machine, not having enough fabric length to be to able quilt to the edges. I know that there are extenders you can buy when you need to make that final section work, but I did discover another way.
I took a length of elastic and wrapped it around the outer bar. Using pins, I attached it to the shorter fabric, allowing it to stretch out so the machine can make it to the quilt edge as needed.
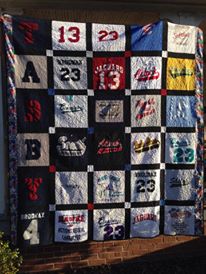
This quilt is a great example of what a quintessential senior quilt looks like. In this case there are student council shirts, football jerseys, baseball uniforms, and goofy teacher shirts. The sashing has gold crepe back satin because I really wanted the luster that came with actual gold colors.
I sent her the update pictures as I went.
This mom also asked for a large gold G to be on the back as a nod at the high school logo.
I liked this one so much I had a small photo session in our school library.
*Quick note – the top photo is one of the in-progress ones. I forgot to get a picture of the finished project due to various reasons.
This quilt was hard. Not the design. No, this one was hard because of who it was for. This was the first quilt I ever made for a mother. Emotionally, I felt a huge responsibility to make sure this quilt was 100% perfect. It needed to do justice to her son’s memory and who he was.
So I took stock of what I had – about half and half t-shirts and dress shirts. The son had done mission work and had a ton of HOPE shirts. He also had bold taste in dress shirts – wearing some pretty gorgeous pastel stripes. It was almost a shame to cut them up. Almost.
I’d shown my friend who commissioned this pictures of a previous quilt I’d done that kept the collars attached, but she went for a simpler look. I used the front of the shirts, sewing down the fronts so the shirts wouldn’t come open.
The HOPE shirts were a pretty easy element as well. The problem came in with one special shirt that had a lot of well-wishes on it. They were all over the shirt – front, back, sleeves, etc. There was nowhere I could make a block that wouldn’t leave out a LOT of people’s messages, so I was stumped. I looked back at the other t-shirts and realized I had a fair amount of free space beneath the HOPE logo, so I went for it. I cut out each and every well wish, ironed it on with double-sided fusible interfacing, and placed them all throughout the quilt. I was worried about the ink running off, so I soaked the shirt in salt water in an attempt to set the ink better. For the most part it worked, but my arch-nemesis, the color red, struck again. It made a bleed spot on the quilt that I caught after washing it, and I panicked. However, with some localized scrubbing I was able to get it out.
There was a shirt included with a lot of signatures, so I cut them out and placed them around the quilt so as not to lose any.
This quilt was also a bit funny in that I didn’t do my usual process of meeting my friend at JoAnn’s. She picked out the backing fabric from some scraps and squares I had to my house. It worked, though, and the blue fabric complimented the pastel dress shirts nicely.
One last element that was new was the message block. My friend found an idea online that involved having a sweet message “from” the son. When I read the message, something seemed off. It had his name typed out, and I wondered if I could possibly go one step further. I asked her if it was possible to get me a copy of his signature. She was able to, and after adding it the message looked more sincere. There was something about that signature that felt perfect.
I was asked to include this label. I realized a signature would be perfect, and they were able to scan one for me.
This is also one of the few pictures I have with the recipient holding it.
A memory quilt made from dress shirts and t-shirts. This is the mother holding it after it was gifted to her as a surprise.
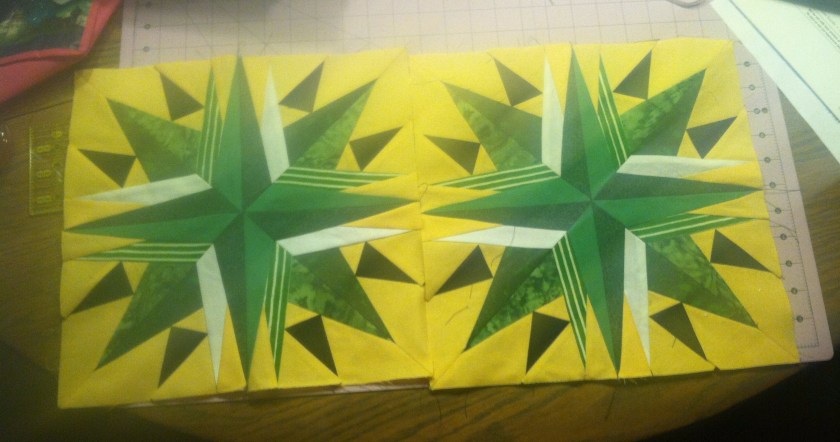
Several years ago I decided somewhere that I really wanted to surprise my husband for Christmas. In the past, he pointed at certain quilt designs and commented on how he really liked them. Of course, it was one of the harder designs that he liked – the Mariner’s Compass. At the time it was so far outside of my skill set that I muttered something along the lines of “keep dreaming.” But I really wanted to give him something at Christmas that would WOW him, so I revisited the idea of the Mariner’s Compass design.
It turns out I would need to learn this technique called “paper piecing”to do it. I looked at a couple of Youtube videos, but the best help was my best friend who had already done a paper piecing dragon quilt. After a little tutoring session, I gave it a try.
Slowly I gained confidence and made more and more.
I used his favorite color combo – green and black – and I accented it with white and gold. For better or worse, paper piecing Mariner’s Compass stars don’t look like stars until the final steps of the paper piecing process. This would be annoying except for one important point – I could work on them in front of him. In fact, I pieced most of the stars together right under his nose!
Things became more difficult with I needed to add the corners and begin quilting them. At that time, I was still only using the free motion foot on my Singer Confidence to quilt projects. There was no way that a king-sized quilt would fit for me to quilt anything. I looked up other techniques for how to quilt in smaller sections and then join them together. From what I saw, it looked easy enough, so I decided to take the whole thing one block at a time – all 16 of them. At one point, I took my machine to a friend’s house and quilted there, so I could get away from prying eyes.
Words cannot express the joy I felt when I had successfully joined together those first two blocks! And the relief I felt when I’d finished the whole quilt plus binding – it was beyond anything else! I couldn’t stand it and had the hardest time waiting until Christmas.
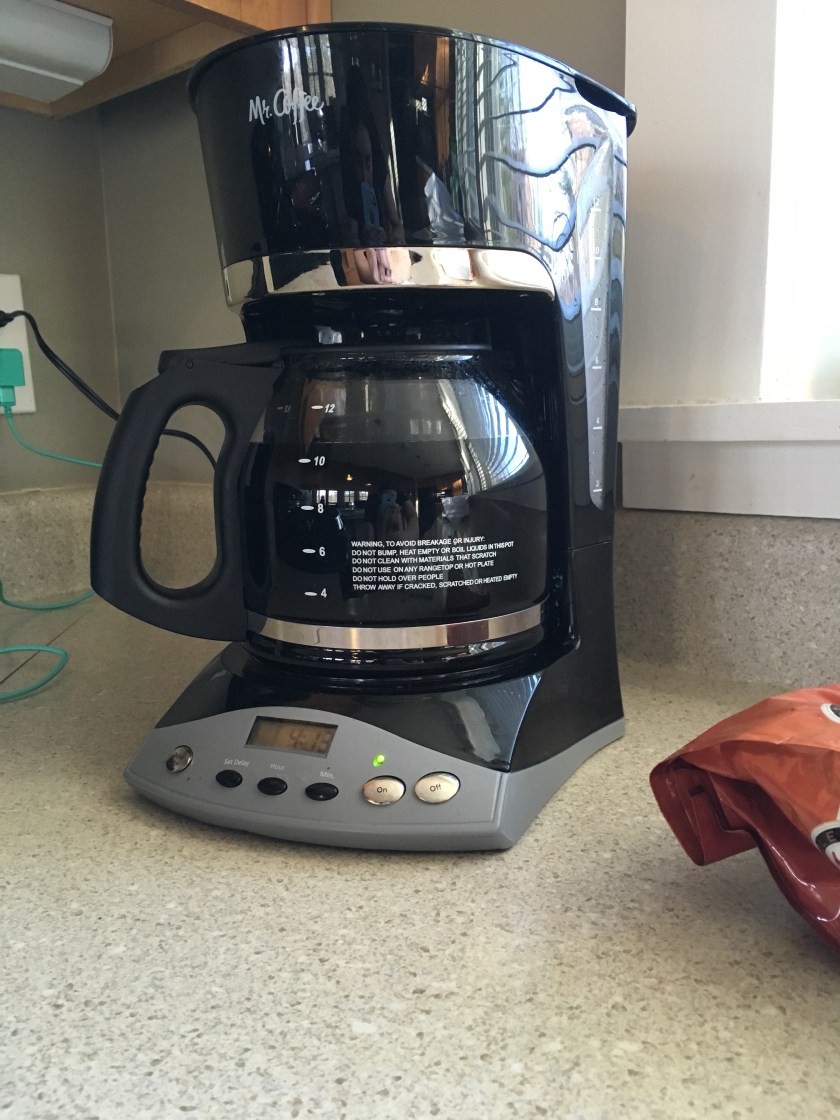
In my other life, I’m a language arts teacher. Today is the beginning of Spring Break, and I’m celebrating the best way I know how. I’m getting together with three other friends for a crafting weekend!
I’ve been looking forward to this so much, and I could barely concentrate at work today – which put me on equal footing with my students.
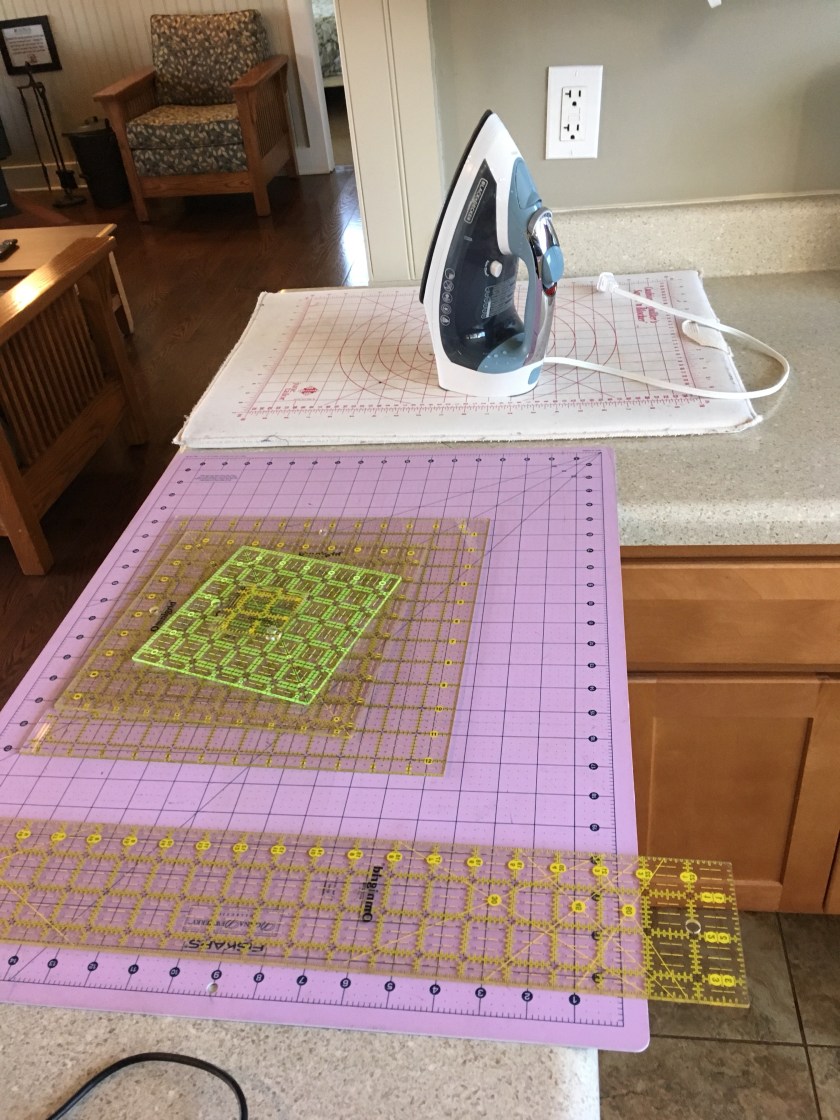
I’ve made kits for sewing, bought new rotary cutter blades, a new iron, and I’ve found my favorite coffee creamer.
I cannot wait to see all my friends and sew!
My obnoxious goal for this weekend is to complete all eleven kits I’ve precut.
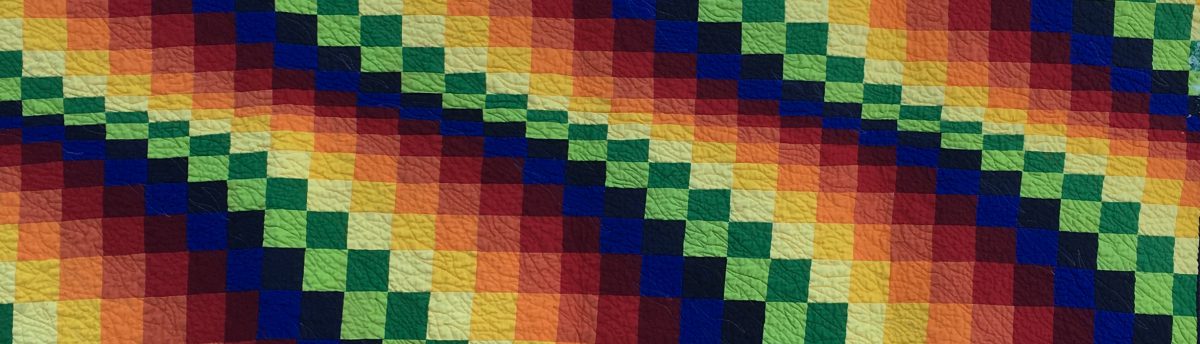
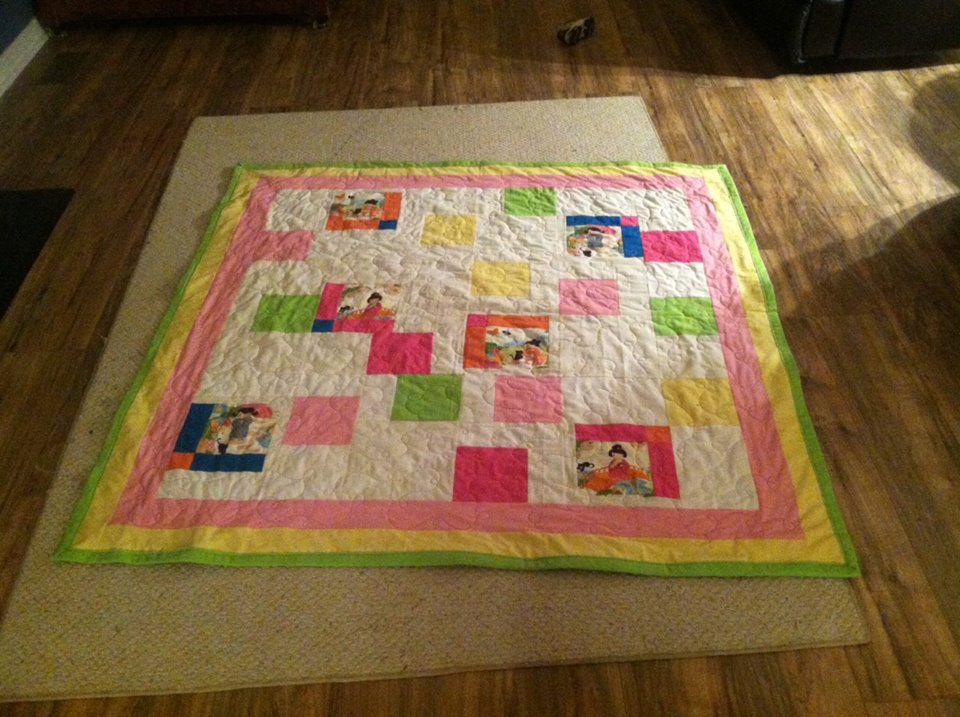
This quilt is 100% made from fabric, thread, and batting I had on hand. One quiet Friday night I came across some cutesy Asian-themed fabric from a previous project, and I decided to make something of it with the goal of using only fabric I had on hand. I had a secondary goal of completing the top that very night.
The fabric was cute, but it didn’t lend itself well to being simply cut into regular squares. The little girl images would have been halved or missing parts. So I cut as many whole ones out as I could, resulting in just six squares – much less than I thought. But that was alright because I had plenty of colors to accentuate, and I had planned on having a good deal of white fabric as the background.
The piecing of this little top was akin to putting together a puzzle, but I eventually did it. I was happy to use up some of my fabric stash as well as create a cute and whimsical top. I already had a feeling what I was going to do with the top if it came out as I hoped.
When I first designed it, I only had the main part with the white background, and I was…whelmed. I just didn’t love it, and I wasn’t used to that. I posted a picture on a quilting group, asking for advice, and everyone pretty much said the same thing – a border. Well, I had pink and yellow aplenty still at this point, so I decided on two colors to ensure everything was tied together nicely. And the group was right! Once I added the borders it did look better.
The backing was the same story as the original Asian fabric – I bought way too much for a different project. In fact, I had so much of it that it sufficed for a backing! That meant I had at least four yards of lime green fabric lying around. Yeek! I was glad for a chance to put it to use.
I ended up going with a variegated pink thread for the quilting.
In the end, I was glad I added the borders, and I had a quilt I was fairly proud of. I ended up donating it to my children’s preschool’s silent auction. I did get a chance to see it back in January at a birthday party, and the mother told me it was holding up very well.
My first t-shirt/memory quilts were the first four I did for my family from my father’s clothes. The first quilt I did for someone else was a softball quilt I made for a friend. In fact, it was the same friend who commissioned the Harry Potter quilt! Since I’d cut my teeth, so the speak, on those first four, I’d learned a lot and was fairly confident in my ability to do her softball jerseys justice.
One thing I hadn’t done before but was confident I could handle was putting a name on the quilt in addition to the jerseys. For this one, I printed large letters and cut them out against fabric with fusible interfacing. Nowadays I just use a projector, and I can get more creative with my fonts as a result.
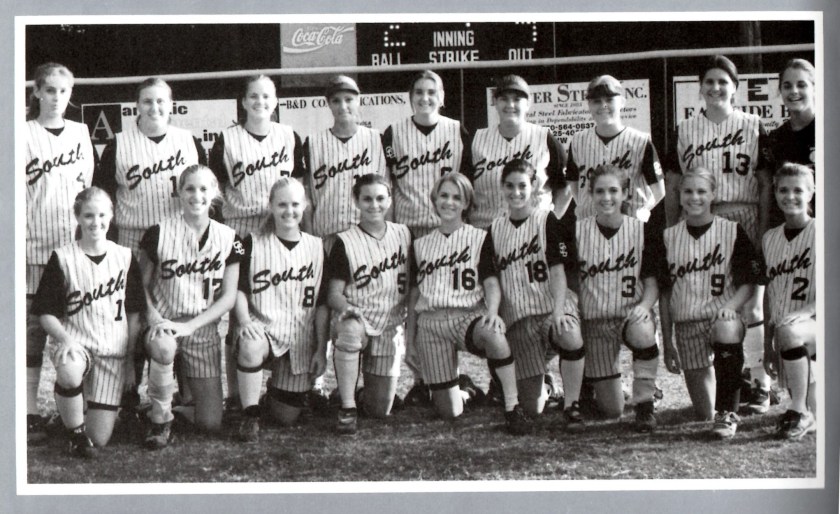
The one surprise I managed to work in for her was a picture of her state champion softball team from the high school yearbook. She had softball jerseys from every part of her life except high school. Those had been purged a while back. But I could tell this was important to her, so I found a yearbook from that year, scanned the picture, and printed it on to printable fabric as a nice surprise.
School yearbook picture – I scanned this and included it in the quilt as a surprise since she’d lost all her softball shirts from high school.
To quilt this one, I chose to use the invisible thread since there were so many colors. My machine didn’t like it even though the quilt itself looked great.
I also made a pillowcase from the leftover shirts that weren’t able to make it onto the quilt. I’m rather proud of this one, but it threw me for one last loop right as I was getting ready to hand it over.
Sometimes people don’t understand that quilts are supposed to “dimple” up, and they’ll do that after the first wash. As a result, I tend to wash the quilt before handing it over to my client so that it already looks like what it will be, no surprises. I did the same with this one, but since the shirts had been in a tote in the garage for years the letters didn’t hold up. I pulled the quilt out of the dryer and panicked when I was cracked and incomplete letters on several of the shirts. I just couldn’t give it over like that! I turned around and grabbed some black t-shirt paint I had from a different project and basically “spackled” the letters, filling in the gaps with that t-shirt paint so that they would hold up better. In the end it worked, and my panic went away.
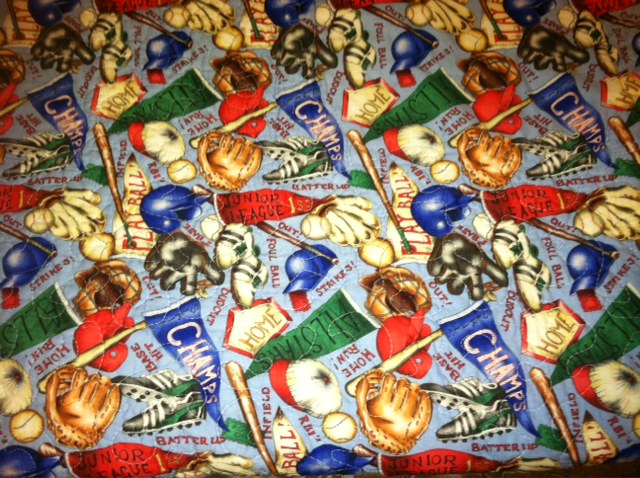
For the backing, we had a hard time finding a fabric that didn’t scream “baseball”, and in the end we went with this one. I liked the overall look.
This little cot quilt was one of the first quilts I made…back when I was going to bust into that lucrative niche market of Civil War quilts. Ha! This one never sold, but that’s alright. Currently it, along with two other quilts, is MIA since our move to the new house less than two years ago.
I’m hoping all three turn up at my mother-in-law’s house. I try not to think too hard about it in the meantime.
**UPDATE** They have all been found!
Anyhow, this is a cot quilt because the dimensions were meant for a quilt being used by a soldier – most likely on the march. My husband and I have a friend who used to make Civil War replica shirts, and he gladly gave me a bag of his scraps. I then went in and added solid pieces of different colored cotton fabric.
I was still new at the whole quilting art, but I knew enough to know that 1. quilts were NOT machine-quilted during that time and 2. I was NOT about to hand quilt it if I intended on selling it. I figured no one would buy it for the amount it would take to make hand-quilting worth my while. (Joke’s on me – no one bought it anyway. And now it’s lost.) This left me with one other option, making it a tie-quilt. I’m bit partial to tied blankets because I have a Holly Hobby baby blanket that was tied. I must have played with those yarn ties for hours as a child.
I was trying to be authentic and used non-synthetic yarn to tie the quilt at the square corners, but in doing so the yarn frayed and looked fuzzy. It was sound as far as strength and knot, but it looked funny. In the end there wasn’t much I could do about the fuzz, so I left it alone. But I’m still proud as it’s one of the first ones I’d made aside from baby quilts for my niece.
I tied it together instead of quilting it.
So yes, I’ve come a long way from my early quilting days, but this one makes me smile. It also reminds me to organize a search party and look for those missing three in my mother-in-law’s basement.
This was another memory quilt that was particularly loaded with emotion. A cousin asked me to make two memory quilts from her husband’s clothes for her children. I’d grown up seeing my second cousins off and on throughout the years, but it had been way too long since we’d last met up. In fact, the last time I’d seen them was when my boy cousin was going through his “girls are icky” phase, and he wouldn’t talk to me. Since he was one of the few cousins close to my age, you’ll understand when I tell you that it was YEARS before I forgave him this slight.
I’m 35 now. I suppose I’m over it.
I guess.
Anyhow, when their mother, my beloved cousin (who has never gone through a phase where girls were icky) asked me to make memory quilts, of course I agreed. When she gave me the clothes, I noticed that there were no t-shirts at all. The bags were a huge lot of collared dress shirts.
Well we looked at a lot of options for how to incorporate dress shirts into a memory quilt, and in the end we decided there was something about the collar on the shirt that needed to stay. That being said, did you know that collared shirts weren’t meant to lie flat? They were a bit of a doozy to finally get right, but I managed to get it situated in the end, including a quick stitch down the front to ensure the shirt front didn’t open up. I used patches and other parts of the shirts to make the borders and sashing intersections.
I did add in three pictures for each quilt.
I have been assured by the same guy cousin that his quilt gets a lot of use and has held up well to its constant use. That always makes me happy to hear that 1. a quilt I made is regularly used and 2. it’s holding up well.
In the end, I tried to do honor to the father’s memory and make sure his shirts reflected him. It was a different challenge with all those curves, collars, and buttons, but I loved the end result!


You must be logged in to post a comment.