


This quilt goes down as one of the most emotional quilts I’ve done. For starters, I was asked to complete it by another quilter, so I felt like it needed to be perfect. Another consideration was the fact that it was a memory quilt in memory of a younger person. I’d done memory quilts before, and it wasn’t the first one I’d made for a mother. But this one felt different, and I wanted more than anything to do the lady’s memory justice. After all, I remembered her memorial service because I volunteered to help in the church nursery while it was going on.
Some things that stood out, however, were that my normal medium was gone. This was not a standard t-shirt quilt. In fact, there wasn’t a single t-shirt in any of the bags of clothes I was given! But what I DID have was dress clothes. Clothes with cool textures. Clothes with beautiful embroidery. Clothes with unique colors. So I sat on the quilt idea and wondered what to do.
The mother, being a quilter, had suggested something akin to a “crazy quilt” style, but none of the patterns or images I found online seemed to be exactly right. I looked around and must have seen 100 different ideas on how a crazy quilt can look. And then one morning during my shower, where I do my best thinking, I thought of the 101st crazy quilt pattern!
Here’s the premise. The lady was an artist. Artists are all about color and balance and placement. So I would make a sort of art gallery out of her clothes. I would help to emphasize the “gallery” part by adding a shadowbox element to each of the sections. This would also allow all her different colors, textures, and details to be featured.
I started by going through the clothes. I’d just gotten a new/old dining table to use as a craft table. It was in my garage, so I stood there that night, listening to the chirping of crickets, at peace, sorting the clothes into the different color stacks. I had enough for eight different color panels. That left one empty block. Then I had an idea I hoped would work for the last block.
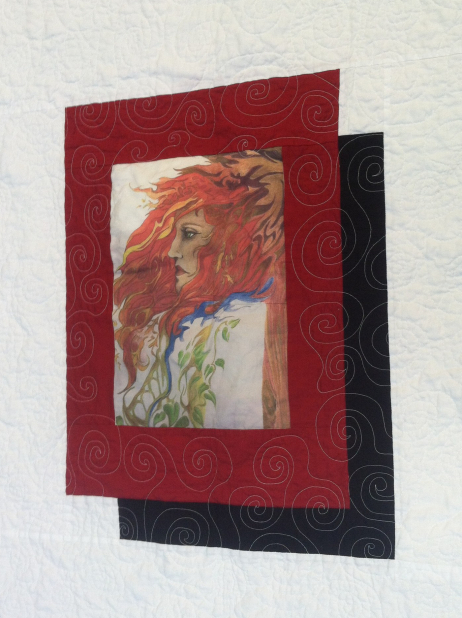
Since she was an artist, and this was her gallery, I went through her old Facebook posts until I found exactly what I’d hoped to find - her artwork! There’s some debate on whether the picture is a self-portrait or Tori Amos. She wasn’t exactly distant comparison. It was one of the few pieces I found, and I downloaded it immediately.
Now that I knew how many stacks I had and how many blocks I could make, I sent the mother a draft layout. We worked and switched a couple of color sections, and then I got the green light to start cutting.

One of the first ones I did was red. I’d been told she loved red; it was her favorite color. So it seemed natural to begin here. After that, I got better at my blocks and was able to knock out the other seven faster than I anticipated.


After that, I enlarged the artwork and used two pieces of fabric paper to print it out. It was still smaller than I needed, so I added a red border to make it the same size as the other panels and began piecing the top together.
I added the shadow boxes and was happy to see them coming together. It wasn’t long before I was able to send her a picture of the completed top.

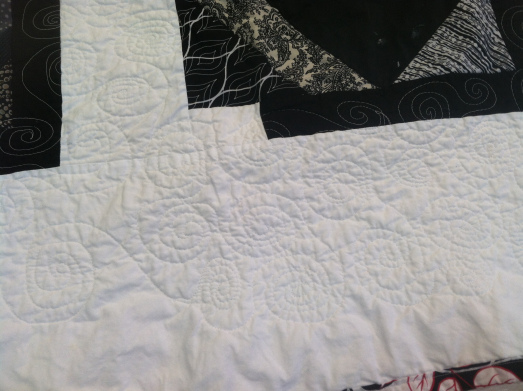
Now the next challenge was with the quilting. I thought long and hard about doing a simple stipple pattern, but then I had another idea. I decided to revive the circle-swirl quilting pattern because I wanted to add some whimsy to it. I also didn’t want to distract from the clothing panels, so I kept the main part of the quilting to the white area. I used the dreaded “invisible thread” to reinforce the clothing panels and make sure they didn’t shift or bubble up. (Imagine trying to sew with fishing line and you’ll understand why this kind of thread is a last resort.)
We went back and forth on the backing and finally settled on a black, white, and red pattern. From there, I had to complete the last element - but maybe the most important. I had to make the label. That took some thinking because I didn’t want it to be a let down. I remembered that the mother was happy I’d chosen to focus on colors because her daughter’s memorial service featured a homily from a friend who described her in terms of color. I loved it and was startled because, as said before, I wasn’t at the actual service. I was in the nursery.
Keeping that in mind, I asked for a copy of the friend’s homily. I used phrases and created a label based on that. Now the lady’s sister deals in graphics, so she worked her magic and made my original label look far better.

I printed the label on fabric and sewed it to the back corner.

This quilt was a long journey, filled with emotion. But it was also filled with creativity and pushed me to new limits. In many ways, the artist from whom it was made inspired it, and I feel like she had a hand in its making. In the end, it was and remains an honor to have been tasked with making this. It is one of my favorite and proudest works.
Related Blogs and Posts - these are different memory quilts:


You must be logged in to post a comment.