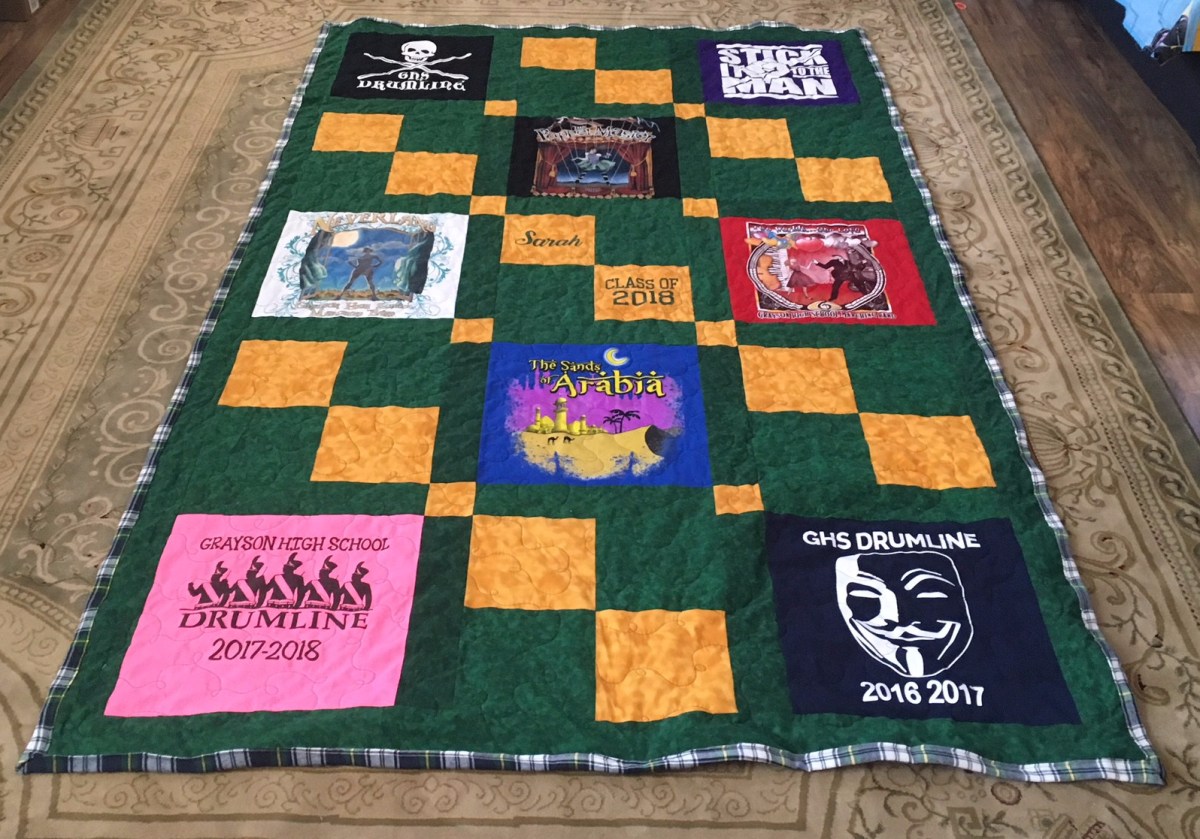
This quilt is a great example of why I tell folks not to worry about not having enough t-shirts for a certain size quilt. I can always add in more blocks. For example, this person had 8 shirts but wanted a twin-sized quilt for her daughter. So I simply went in and added quartered blocks alternating with the shirts. I like the overall look.
I was still waiting for the embroidered patches to get back to me. Hence the hole in the middle.
Also, I had a couple of clients want to know about embroidery. That is one service I do not offer as of yet. Sometimes I think about getting a fancy embroidery machine, but then I remember that I am limited on space and funds and time. I don’t know if I would even have the time to fully learn it. I still have a serger that I am too scared to touch.
One thing about this quilt that I especially love is the backing. It is made from a fabric called “shirting flannel”. So it’s extra soft. Basically, it’s pajama pants material. Can you imagine?! A quilt with pajama pants material on the back?! I keep looking for more ways to incorporate this kind of material into my quilts as it’s just so darned comfy!
One thing I love about the quilting community is that we love to “talk shop”. When I’m at my booth at craft fairs, I always have at least a couple of quilters come up. It feels good when they admire my work, and we chat about patterns, etc.
This past weekend I had a quilter walk up and say hi. She commented to me that I was under-priced. The truth is…she’s right. And I know it. I looked at her and nodded. All I could say was, “You know, those who don’t know about quilts think I’m over-priced. Those who understand quilts know that I’m under-priced. What can you do?” I’ve been lucky for the most part in that most folks will quietly look at a price tag and walk off if it’s too high for their expectations. I’ve only had one person gasp and comment about how high it was. I didn’t even argue. I’ve become very good at shrugging.
Basic economics provides an understanding of price points. You have to find the lowest you can go without sacrificing profits while also going as high as your customer is willing to pay. It’s get tough, though, when store quilts come into the picture. A quick search for “quilts” at Target.com turned up exactly what I mean. Take a look. Some pretty quilts…not a single one above $150 in price. This is the starting price for a t-shirt lap quilt for me. That same lap quilt that other quilters have commented was under-priced. So you see my struggle.
So I’d like to take a moment and let you in on the world of store-bought quilts. I’d like to start off by saying that I have absolutely no issue with owning them. I have one my grandmother gave me for college, and it is precious to me. What I DO have a problem with is folks who expect store prices for handmade quilts. I’ve seen charts and stuff floating around the internet, but I decided to go upstairs to my own store quilt and show you what I mean.
Firstly – quilts are supposed to have 1/4 inch seams. That is standard. And at first glance, you’ll notice that this seam is 1/4 inch. This is a double-wedding ring style quilt, and the 1/4 inch seams were where the multi-colored fabric was joined to the white fabric.
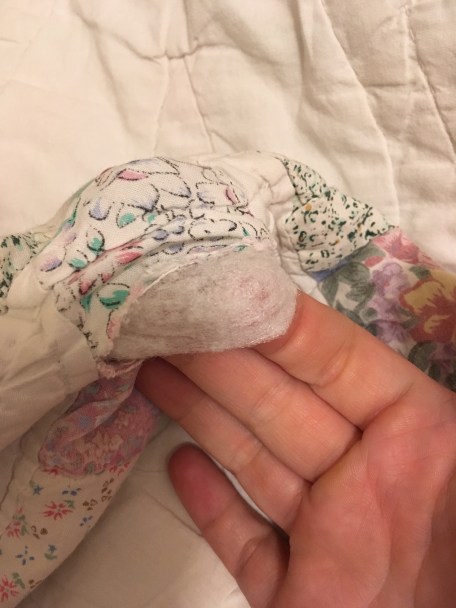
However, if I looked a little closer at other parts, I noticed something different. My ruler is set to 1/4 inch for reference.
Yup, you’re seeing correctly. That is about a 1/8 inch seam. I love this quilt, but I did notice certain parts of it came apart rather quickly. This is one of the biggest differences between the store quilts and the handmade ones. You can see in this picture where my pretty store quilt has come apart at the seams in a couple of places.
1/8 seams don’t hold long – as is evidenced by the gaps you see here.
Another difference is the batting. For those who don’t speak “quilt”, the batting is the inside of the quilt. It’s sandwiched between the top and bottom fabric. It’s what helps to give the quilt its weight and warmth. Now some folks are picky about their quilts in specific areas. Some only use the highest quality fabric and would most certainly give me the stink-eye for shopping at JoAnn’s fabric store. Some are picky about their binding (the sides of the quilt) and only hand-sew it, disdaining anything done by machines for finishing elements. For me, I’m picky about my batting. I’ve seen some mighty pretty quilts that I felt weren’t quite “right” because they had polyester batting in them. That being said, it’s the quilter’s choice, and I would never criticize someone else’s quilting choices, mine being up for scrutiny in return. It’s simply my personal preference to use cotton batting. In store-bought quilts, you’re almost always getting sub-par batting. My store quilt is nowhere near as heavy or warm as the ones I’ve made for my family or to sell.
Polyester batting – not my personal preference.
For those playing along at home, my preference is the Warm and Natural Company 100% Cotton Batting. It’s warm without being bulky (aka low “loft”). I like my quilts thinner but warm, so cotton batting is ideal. Polyester batting is what you want when you’re going for a puffy look.
As for the process, I documented my steps in making a t-shirt quilt for my cousin. Here’s the link to my Facebook page photo album. In it, you’ll see all of the steps. Here it is.
So if you’re new to the whole quilting deal or are looking to buy one and are getting overwhelmed by the prices, then consider what I’ve told you. If you would like even more insight, take a look at this article. It is a goldmine of information on pricing, etc.
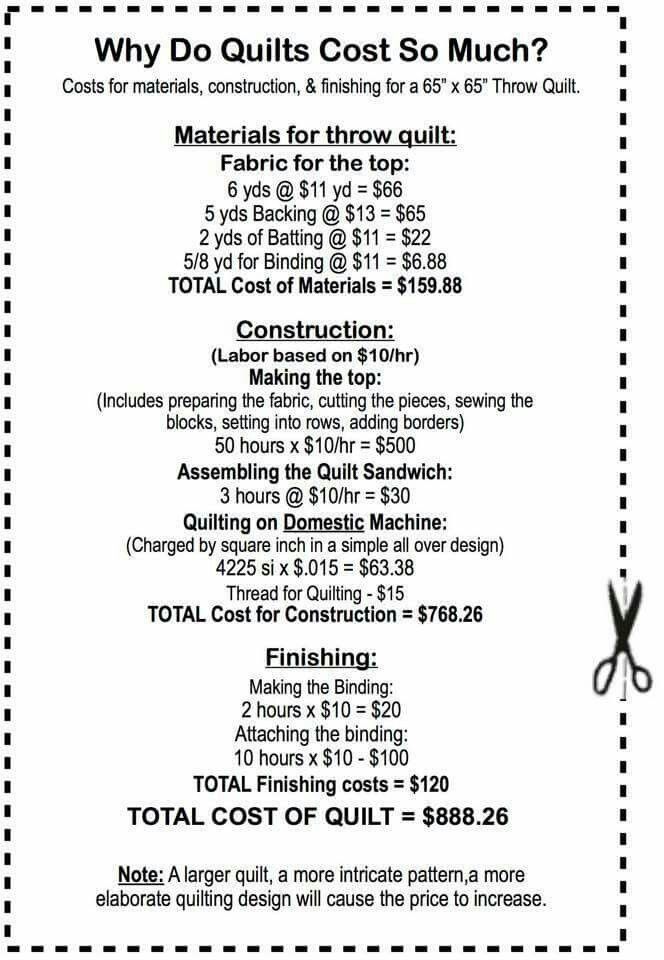
*Side note: the featured image quilt costs chart is not my design. I do not know the original creator of it. I do think it’s a bit of a hyperbole, but I like it as an example of the differing costs that many don’t consider.
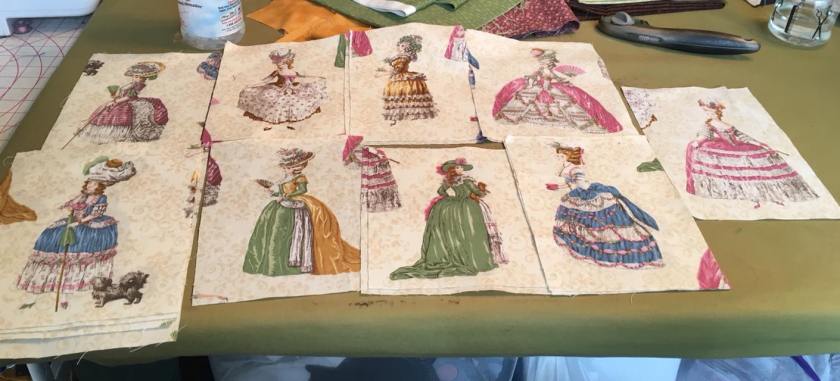
A few years ago I went to a Sewing and Quilting Expo, and I bought some fabric there that featured French women. It was such pretty fabric, and I just HAD to have it. Well, I bought and then didn’t know what to do with it. So it just sat in my fabric stash for a good, long while.
In my recent drive to take care of some of my long-resident fabric, I brought this piece back out. Well, it didn’t lend itself to the usual quilt fabric cutting, so I used rulers and cut out individual ladies. To do this, I ended up sacrificing every other row of the print. It felt positively sinful, but it was either that or put it back in the box for an indeterminate amount of time longer.
French Ladies
I’d wanted to try a technique for a while where you created a block that featured an off-centered focus in the middle. Since the ladies were of varying sizes, I figured now would be as good of a time as any to try it out.
I did have to break my rule a little and purchase some blue, but otherwise I had all of the other fabrics already on hand – even the backing! Yes, I was thrilled when I noticed some fabric I’d purchased at an estate sale in the neighborhood matched the colors on the front and also possessed a slightly French feel. Boom! Backing! All I had to do was make it slightly bigger by adding on some more of the gold fabric.
I added borders to help tone down some of the business from the blocks, and I’m happy with it, especially the pink fabric on the outermost border.
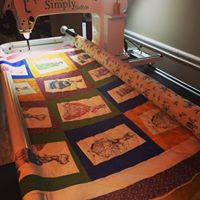
Since gold was featured so widely, I decided to stick with that and use gold-colored thread for the quilting part. The quilting itself being simple waves all the way down.
It was a fun project, and I’m always happy to pick up a new technique.
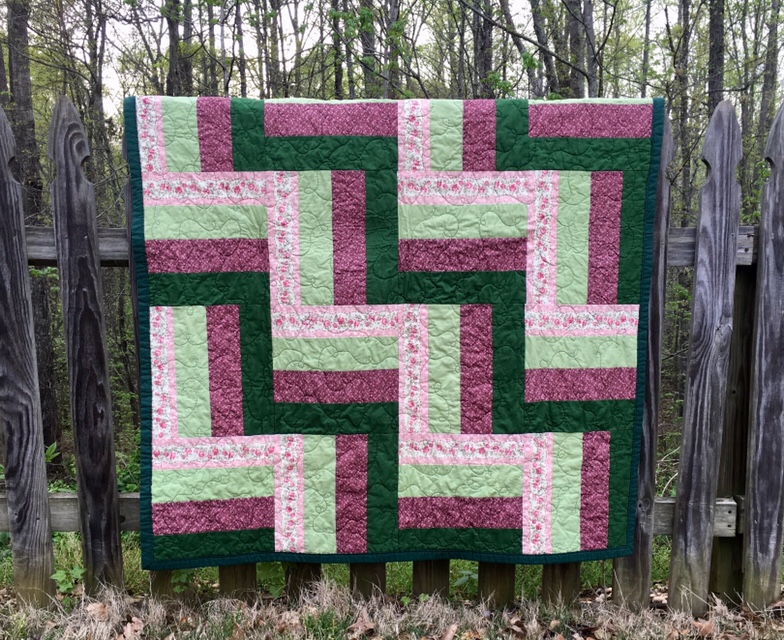
This quilt came as a result of a find in the JoAnn’s remnant bin. I’d picked it up and put it back several times, and I finally decided to just grab it. I coordinated it using fabrics I already had on hand for the most part. Several of the fabrics were left over from previous projects, and a couple were also remnant bin finds. This is the game I play. And I believe I won it this time.
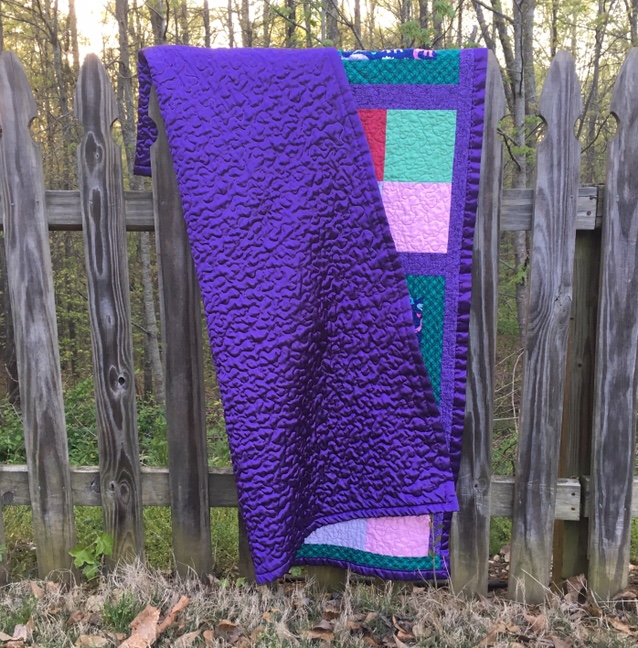
It’s really a simple pattern – quarter blocks alternating with framed blocks and 2″ sashing in between. The only real issue I had was that the purple fabric I used for the sashing is no longer made. It had been in my fabric stash since almost the beginning of my quilting obsession. I knew nothing else was even close, so I had to think. I finally made a pieced top and bottom sashing using the same fabric that framed the dinosaur print. I think it worked out alright.
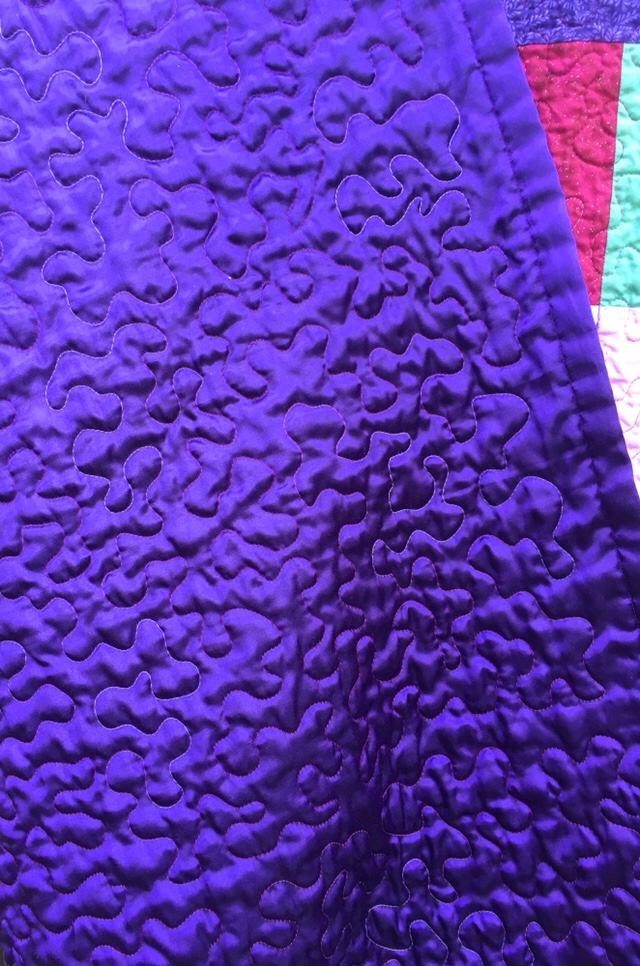
I quilted it using a variegated pink thread and used a purple flannel-backed satin for the backing.
Side note: I was in one of the Sunday school classrooms and saw where the same fun dinosaur fabric was used to make the curtains. I commented on it, and a friend said her mother had recently made those curtains and others for all the classrooms. I got tickled and told her I’d probably bought my remnant as a result from her mother’s purchase. As it is, that dino fabric is very popular and is sold out in many of the stores. I can see why; it’s such a fun print!
When I went to my crafting weekend the other week, I started several quilts. Most of them I had to finish once I returned home because I was short on one type of fabric or another. Well I’ve been busy getting those settled and ready.
I three more stadium quilts. One is blue and silver with crepe back satin backing – the color of one of the local high schools.
Blue and Gray Lap Quilt
Another one is maroon, black, and gold themed. It is the colors and mascot of one of the local high schools. It’s the section in which my church is located, and it’s also where my husband and many of my friends went. (My county is huge, and we have a ridiculous amount of schools.)
Brookwood High Broncos
The third one is another school’s colors -black and silver/gray. Those colors can be bland if you don’t use them correctly. In this case, I made simple blocks and used a pretty gray patterned fabric for the sashing to add texture and interest.
Black and Gray Lap Quilt
Another one I made using the split rail (aka rail fence) design, and it’s garden themed. I also used the cute pink fabric as part of the backing as well.
Garden Fence Lap Quilt
I have two others that are done, but I ran out of daylight to take pictures. I’ll check in tomorrow with their pictures.
I plan on selling these at the craft fairs or on my Etsy shop.
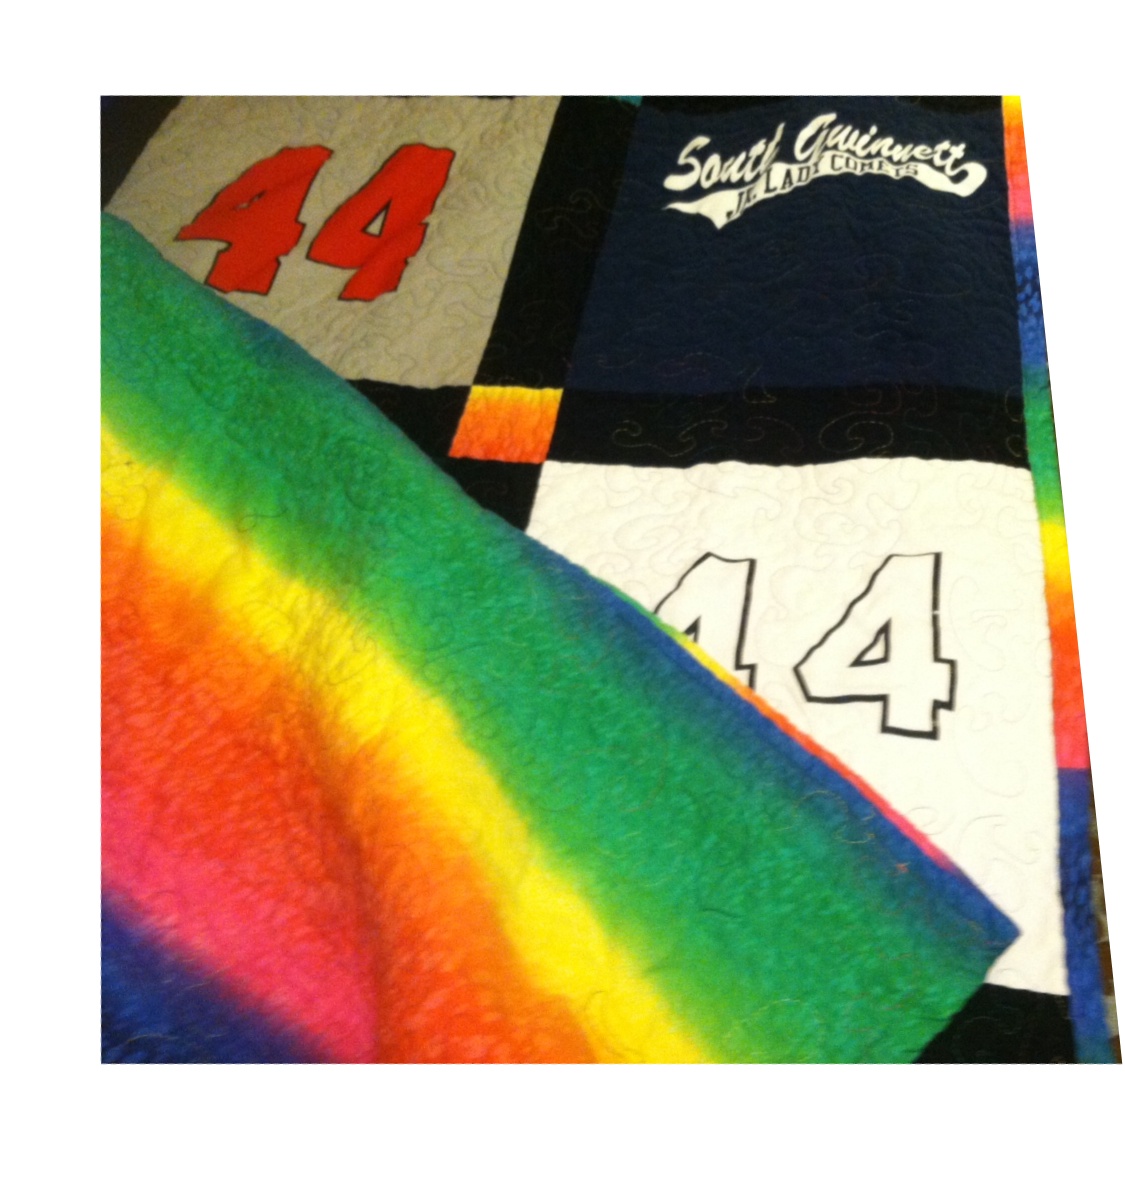
This is another senior quilt I made. It was from her softball jerseys and shirts; she had been playing softball most of her life. I met with her mother, and one of the first things she told me was that her daughter was a “girly girl.” We used this info to look for the backing. We wandered over to the pink fabric section and saw some lined rainbow fabric. It looked alright, but there was something about it that didn’t quite fit. It was right about then I pulled at another bolt and noticed that it was rainbow as well – a mottled one that moved in a gradient. As soon as I pulled it out, the mother and I knew we had struck gold.
Rainbow backing
It remains to this day one of my favorite backings! And I don’t think I’ve seen that fabric since. Pity. I would buy the dang bolt if I could.
As I was working on it, I had an idea and asked the mother to send me the earliest picture they had of the daughter playing softball. She sent me a precious picture, and I laughed when I saw it because the daughter still made that face.
This was a picture of her early years in softball.
The last step was to make her name. I made each letter match one of the jerseys on that same row. I specifically went out and bought zebra print fabric for the “I”. I haven’t used the rest of it and still have it floating around my sewing room.
The hardest part of my process is the fact that I can’t show you all current projects because they haven’t been gifted yet. So until I can show you this year’s haul, I’m going to talk about something else that is important, and I’d LOVE to hear from you.
What is in your creative space? I don’t mean your tools. I mean what art or decor do you have that helps you establish your creative flow?
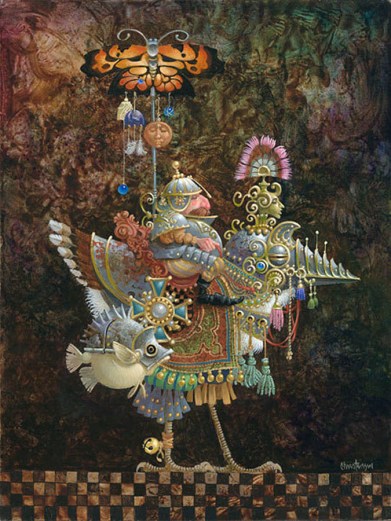
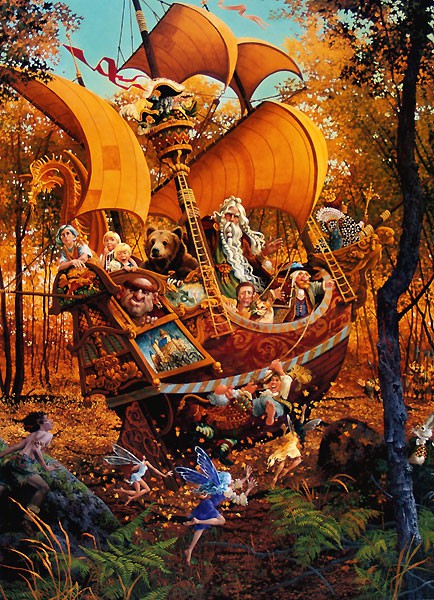
For me, I have surrounded my sewing room with artwork. Most of it is from my absolute favorite artist – James C. Christensen. I first found out about him when they turned one of his books into a cheesy Hallmark movie called Voyage of the Unicorn. I was fascinated and looked up the original book, Voyage of the Basset. From there I found out that the author was primarily an artist and was a professor at Brigham Young University. I learned he passed in 2017, and I was actually in my sewing room when my uncle, who also likes him and bought me an autographed copy of his book, texted me. I choked up as I looked around and realized how much his art defined my own creativity. The featured picture is called A Place of Her Own, and I plan on getting that print one day. I feel like he captured my soul in this painting.
His artwork is so complex and beautiful. I loved all the layers his people wore, and the depth and symbolism he used. He had successfully created another world.
Butterfly Knight by James C. Christensen
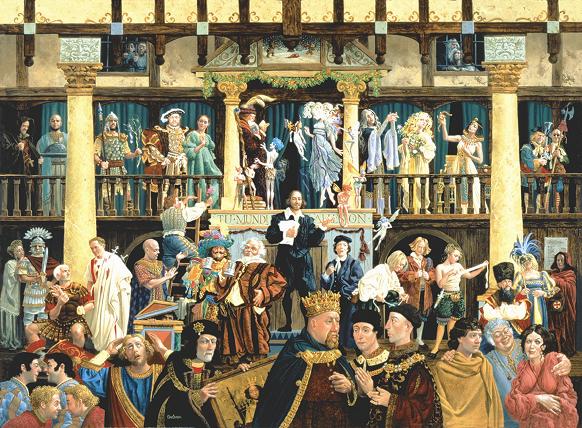
I even have one of his paintings in puzzle form. It’s in a frame in my classroom. It’s a piece called All the World’s a Stage, and it has all of Shakespeare’s plays represented in one way or another with Shakespeare himself in the center. I’ve labeled as many as I could. My students stopped class one day to finally ask me about it because they’d been eyeing it since the beginning of the year.
All the World’s a Stage by James C. Christensen
In my creative space, I have other prints both big and small. One of my favorites was a gift from my husband for my birthday. For a long time it hung in my daughter’s nursery, but I reclaimed it for my new sewing space when we moved. I loved the notion that story-telling was like setting sail.
Tales Beyond TIMP by James C. Christensen
The Listener is also right above my cutting and ironing area. This one fascinates me because I end up noticing something new each time I look at it, and I love the message of tuning out life’s distractions. My creative space is where I can do just that, and I’ll go into my own head and everything else just melts away. In a world where there’s a lot out of my control, my quilts and creative space are mine to own.
The Listener by James C. Christensen
In addition to Christensen’s artwork, I have an original piece I bought at a silent auction. It’s a piece by artist Lori-Gene who I just found out passed away in 2014. Her site is no longer up – otherwise I’d link it. Here is another blog discussing her work. The frenzied fingers of the pianist mesmerized me and reminded me of my piano classes in college.
Original Drawing by Lori-Gene
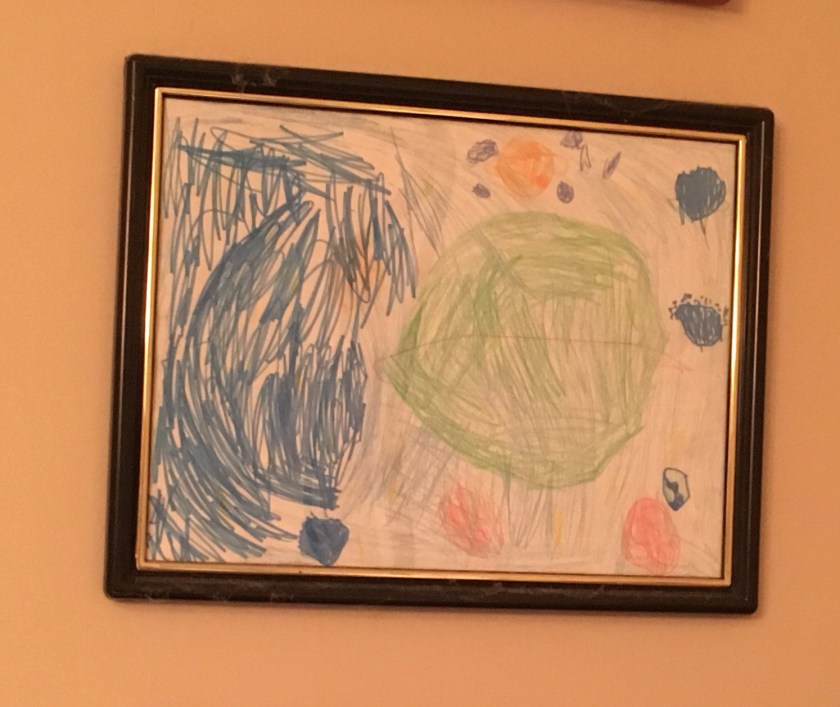
I also have a picture of the solar system my daughter drew. It was cute, but I especially loved it for one specific detail. The planet on the extreme right is Jakku. That’s right – the planet from which Star War’s Rey hails.
Our solar system along with visiting planet Jakku – by my daughter.
I have some other works by Christensen around the room, and my daughter has claimed a small wall nearby for her own artwork. My creative space is slowly also becoming hers. I love it, and it’s my happy place.
This quilt is a great example of what a quintessential senior quilt looks like. In this case there are student council shirts, football jerseys, baseball uniforms, and goofy teacher shirts. The sashing has gold crepe back satin because I really wanted the luster that came with actual gold colors.
I sent her the update pictures as I went.
This mom also asked for a large gold G to be on the back as a nod at the high school logo.
I liked this one so much I had a small photo session in our school library.
*Quick note – the top photo is one of the in-progress ones. I forgot to get a picture of the finished project due to various reasons.
This quilt was hard. Not the design. No, this one was hard because of who it was for. This was the first quilt I ever made for a mother. Emotionally, I felt a huge responsibility to make sure this quilt was 100% perfect. It needed to do justice to her son’s memory and who he was.
So I took stock of what I had – about half and half t-shirts and dress shirts. The son had done mission work and had a ton of HOPE shirts. He also had bold taste in dress shirts – wearing some pretty gorgeous pastel stripes. It was almost a shame to cut them up. Almost.
I’d shown my friend who commissioned this pictures of a previous quilt I’d done that kept the collars attached, but she went for a simpler look. I used the front of the shirts, sewing down the fronts so the shirts wouldn’t come open.
The HOPE shirts were a pretty easy element as well. The problem came in with one special shirt that had a lot of well-wishes on it. They were all over the shirt – front, back, sleeves, etc. There was nowhere I could make a block that wouldn’t leave out a LOT of people’s messages, so I was stumped. I looked back at the other t-shirts and realized I had a fair amount of free space beneath the HOPE logo, so I went for it. I cut out each and every well wish, ironed it on with double-sided fusible interfacing, and placed them all throughout the quilt. I was worried about the ink running off, so I soaked the shirt in salt water in an attempt to set the ink better. For the most part it worked, but my arch-nemesis, the color red, struck again. It made a bleed spot on the quilt that I caught after washing it, and I panicked. However, with some localized scrubbing I was able to get it out.
There was a shirt included with a lot of signatures, so I cut them out and placed them around the quilt so as not to lose any.
This quilt was also a bit funny in that I didn’t do my usual process of meeting my friend at JoAnn’s. She picked out the backing fabric from some scraps and squares I had to my house. It worked, though, and the blue fabric complimented the pastel dress shirts nicely.
One last element that was new was the message block. My friend found an idea online that involved having a sweet message “from” the son. When I read the message, something seemed off. It had his name typed out, and I wondered if I could possibly go one step further. I asked her if it was possible to get me a copy of his signature. She was able to, and after adding it the message looked more sincere. There was something about that signature that felt perfect.
I was asked to include this label. I realized a signature would be perfect, and they were able to scan one for me.
This is also one of the few pictures I have with the recipient holding it.
A memory quilt made from dress shirts and t-shirts. This is the mother holding it after it was gifted to her as a surprise.
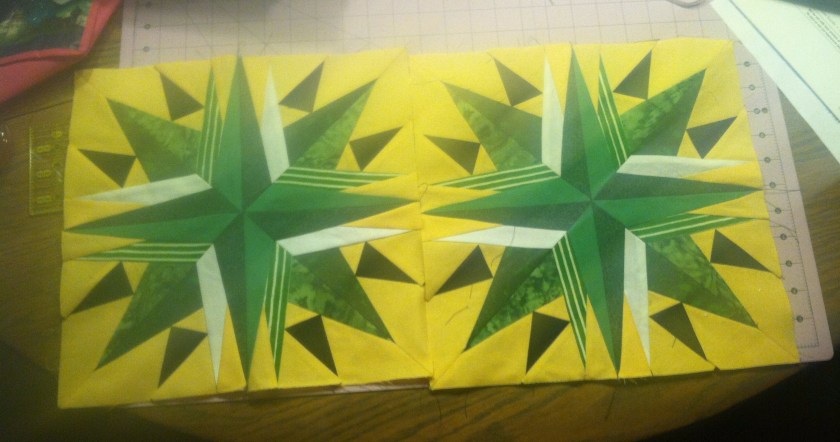
Several years ago I decided somewhere that I really wanted to surprise my husband for Christmas. In the past, he pointed at certain quilt designs and commented on how he really liked them. Of course, it was one of the harder designs that he liked – the Mariner’s Compass. At the time it was so far outside of my skill set that I muttered something along the lines of “keep dreaming.” But I really wanted to give him something at Christmas that would WOW him, so I revisited the idea of the Mariner’s Compass design.
It turns out I would need to learn this technique called “paper piecing”to do it. I looked at a couple of Youtube videos, but the best help was my best friend who had already done a paper piecing dragon quilt. After a little tutoring session, I gave it a try.
Slowly I gained confidence and made more and more.
I used his favorite color combo – green and black – and I accented it with white and gold. For better or worse, paper piecing Mariner’s Compass stars don’t look like stars until the final steps of the paper piecing process. This would be annoying except for one important point – I could work on them in front of him. In fact, I pieced most of the stars together right under his nose!
Things became more difficult with I needed to add the corners and begin quilting them. At that time, I was still only using the free motion foot on my Singer Confidence to quilt projects. There was no way that a king-sized quilt would fit for me to quilt anything. I looked up other techniques for how to quilt in smaller sections and then join them together. From what I saw, it looked easy enough, so I decided to take the whole thing one block at a time – all 16 of them. At one point, I took my machine to a friend’s house and quilted there, so I could get away from prying eyes.
Words cannot express the joy I felt when I had successfully joined together those first two blocks! And the relief I felt when I’d finished the whole quilt plus binding – it was beyond anything else! I couldn’t stand it and had the hardest time waiting until Christmas.


You must be logged in to post a comment.