Hey everyone, I’m still working on getting my Christmas commissions completed, but I took a break earlier to make some wall hangings. I made a Rey and BB8 silhouette wall hanging as well as two rainbow guitar wall hangings. The guitar quilts are very popular, so I think they’ll sell fairly quickly. I’ve made two Rey and BB8 wall hangings before, and they went fast as well, so I’m hoping little Baby Yoda and the Mandalorian haven’t outshined my girl Rey as far as searches and gifts go. I’ll add these to the store page in a bit.
I’m all up and ready as tomorrow is Small Business Saturday! Here’s hoping some of the smaller crafters are feeling the love tomorrow as the holiday season kicks in to full gear.
The Yellow Daisy Festival Online Market begins on Tuesday, Sept 8th. In celebration of this, I’m making some posts about the quilts I have ready to go. Each day I’ll feature two or three quilts and tell about their process and what I like most about them. These and other quilts can be found in the Quest Quilts shop on this website or in my Etsy shop.
I’m going to be honest here; this quilt is my pride and joy. It’s a technique called paper piecing, and, as you can imagine, is quite time consuming. I’d wanted to make something like this for ages and had the paper templates printed over a year ago at least. They’d sat in a box in my sewing stuff, and I’d all but forgotten about them. When Covid hit, I had the time to focus on something that would take a while to do. I’d made a couple of these before, so I knew it would be a commitment.
I’m in love with the colors and really wanted to show a gradient with the rainbow shades. I’m proud that I was able to use all fabric that I already had on hand except for the white fabric. The border was an afterthought when I realized it needed something it help bring all the colors in line. The backing was fabric I’d bought on a whim, but I was in love with it. I used the rainbow on it to adjust the colors on the front. This has to be one of the prettiest ones I’ve made; it’s certainly one of the more technically difficult. My hope is that it finds a home where someone will hang it on a wall as a central focal point.
The Yellow Daisy Festival Online Market begins on Tuesday, Sept 8th. In celebration of this, I’m making some posts about the quilts I have ready to go. Each day I’ll feature two or three quilts and tell about their process and what I like most about them. These and other quilts can be found in the Quest Quilts shop on this website or in my Etsy shop.
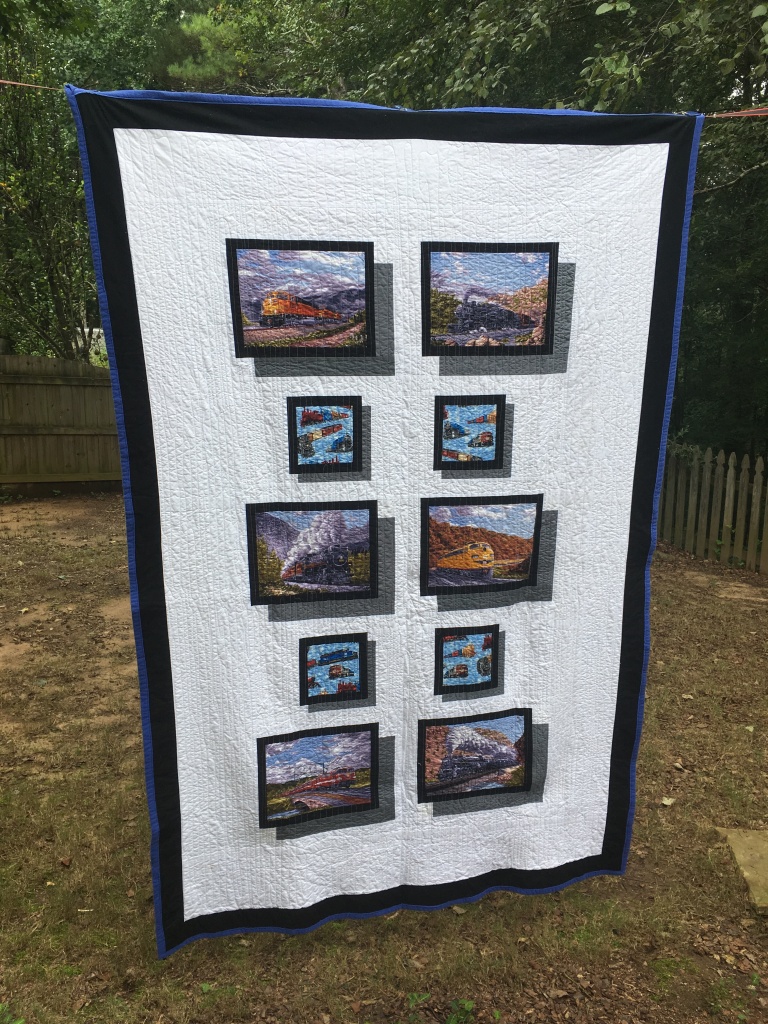
I have two twin size quilts that are ready to go. One is a gorgeous pattern that features a rainbow-colored medallion with nature images inside. I couldn’t decide which color I wanted to bring out in the medallion, so I went for all of them. The color variations give this a neat, whimsical look. I imagine it on the bed or draped on the couch of a lady who loves to garden and spend her days outdoors. It could also be perfect for a little girl who is obsessed with rainbows and outdoors. I decided to finish this off with a leaf quilting pattern.
The train quilt was originally meant to be a lap quilt, but it was so long that I realized I could make it a twin size very easily. I really love the 3-D shadowbox effect and decided that the train panels needed to be shown off through that style. The back is blue flannel, so it’s especially warm for those cold nights. I like the train pictures on this one because they aren’t overly cartoonish. I feel like if this were purchased for a child, the child would like it for a good, long time. But I also feel like it would do well for an adult, too. It would make an awesome quilt for an easy char.
This quilt falls under the “things I’ve been meaning to make” category. English paper piecing is a tedious technique. Each star is made from a wedge, and each wedge is made of two scalene triangles. The design I used for this quilt was a simplest mariner’s compass pattern in the book. The pattern comes from the book Mariner’s Compass Stars by Carol Doak. I’d bought it years ago to make a gift for my husband.
I had originally wanted to make all the stars with batik fabrics, but it didn’t take long to realize that I wasn’t going to have the effect I wanted with what I had on hand. The biggest goal of mine was to use 100% fabrics that I had at home in my stash already. I had the rainbow fabric for the backing and based my colors around it. This was definitely a “quarantine project.” In the end, the only thing that was purchased was some extra white thread. Not bad.
I did get to practice the colors and design on my new quilting software, so that was an extra bonus, and it helped me catch a mistake in my color placement. Can you see what I did?
EQ8 Quilting Software trial run with my colors.
I’ll admit that red fabric is notorious for running dye, even if one pre-washes like I do. This quilt had too much time and love put in to it to take any chances, so I pinned a color catcher sheet over the white sections of the red star. I did NOT come here to play.
The finished result is worth it, and I am in love!
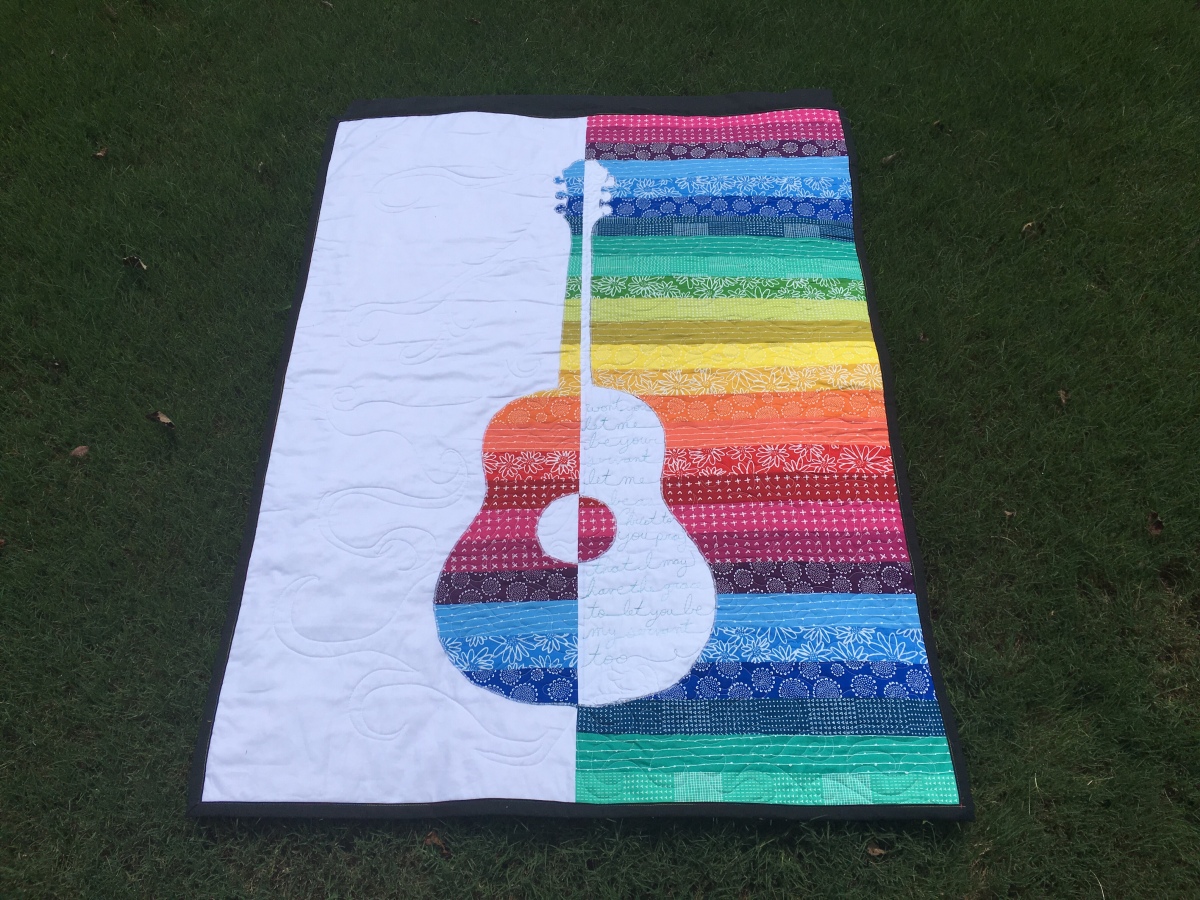
Before this set, I have made four other guitar quilts and one viola quilt in the same style. I bought the music fabric at a Black Friday sale (okay, it was really a Black Saturday sale) at JoAnn’s and had been sitting on it for almost a year. I hadn’t quite figured out what I wanted to do, but the idea of another guitar quilt set had definitely come to mind. When I found a jelly roll at JoAnn’s that featured an earthy rainbow pallet, I knew what I would do!
What I love most about the guitar quilts is the fact that if you cut out the guitar carefully then you’ll automatically have two quilts! If you notice, one of this set is the negative of the other. I love it.
I’ll admit that the guitar pegs at the top of this one are a little more “homemade” than I’d like, but I know how I plan on fixing that for next time.
For these, I used wool batting instead of cotton to give them a puffier look and keep the weight to a minimum since they’re going on a wall. I’m so used to cotton batting that these feel like they weight nothing at all.
In the past, I’ve done a much more detailed quilting design, but since the music fabric already had texture to it, I didn’t want to distract from it. So I ended up keeping the quilting simple.
These are both for sale, and I’m hoping one of them will sell at the December show I’m doing on the 6th.
Update- I currently have a guitar quilt listed in my shop!
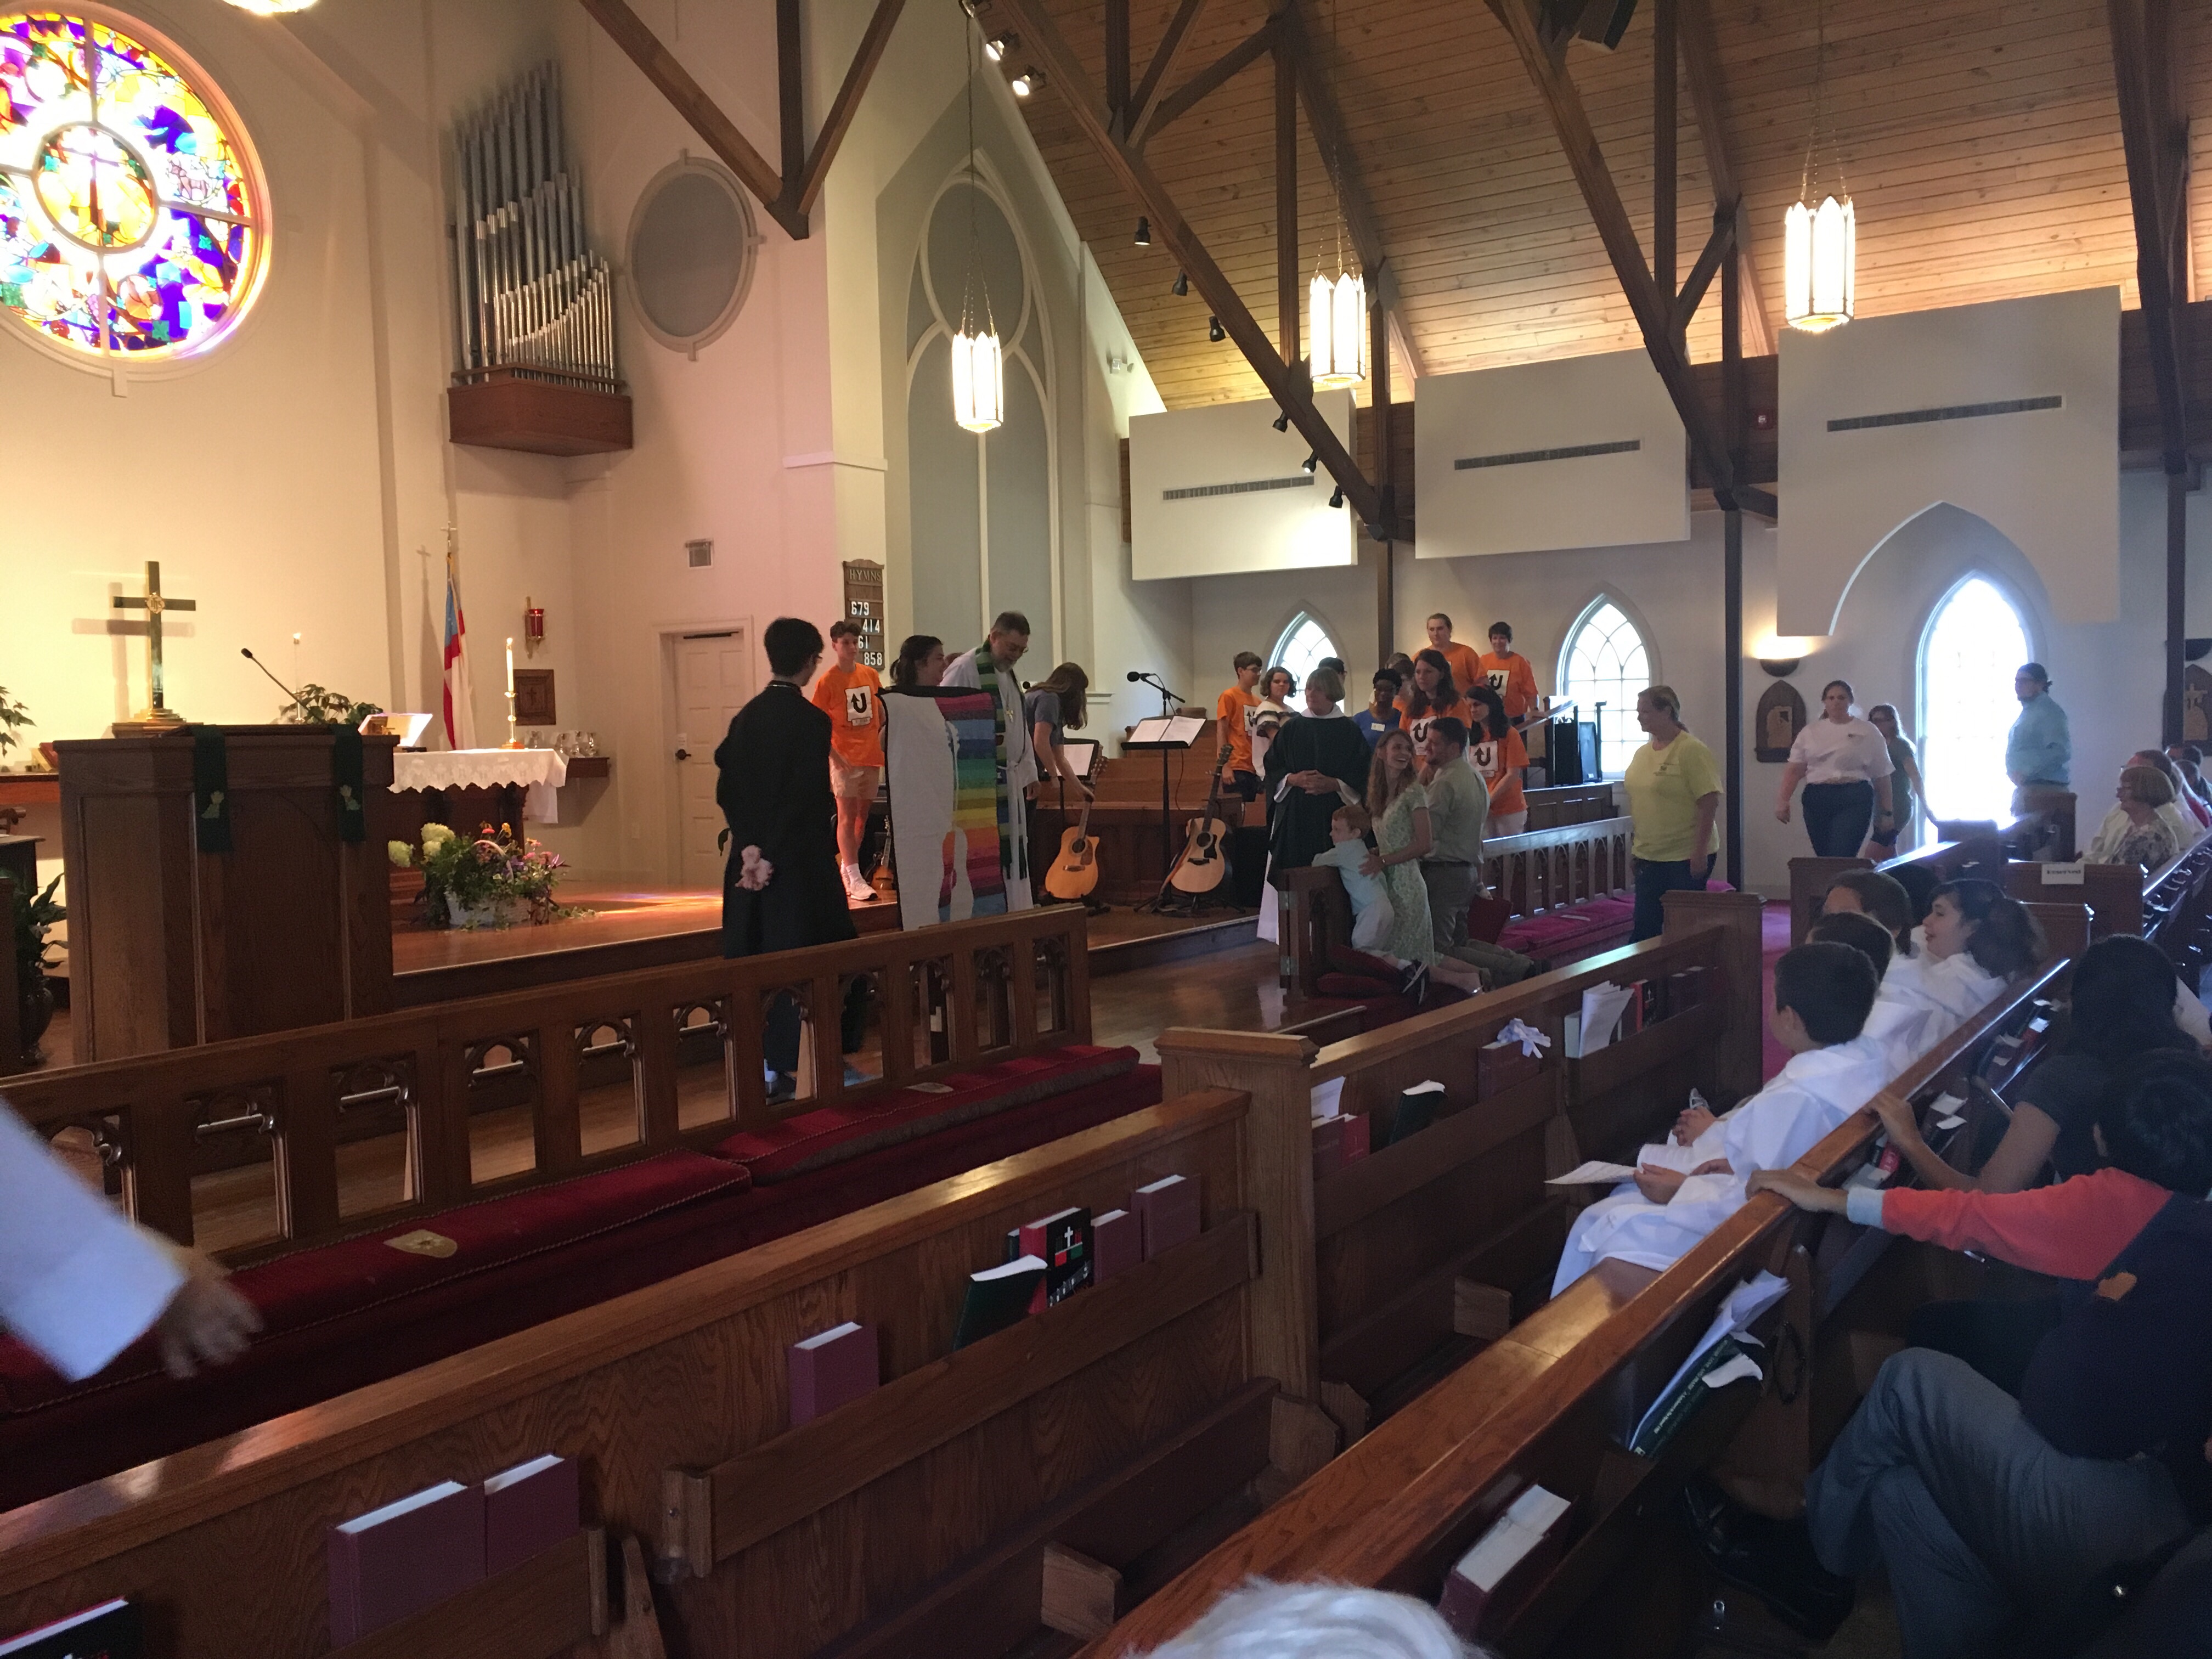
This quilt was given today. I’ve been sitting on it since earlier this month, and I couldn’t make a peep about it since it was for a friend who was also connected with me via social media. She’s a youth minister, and I was asked to make a quilt in celebration of her 15 years of service at our church.
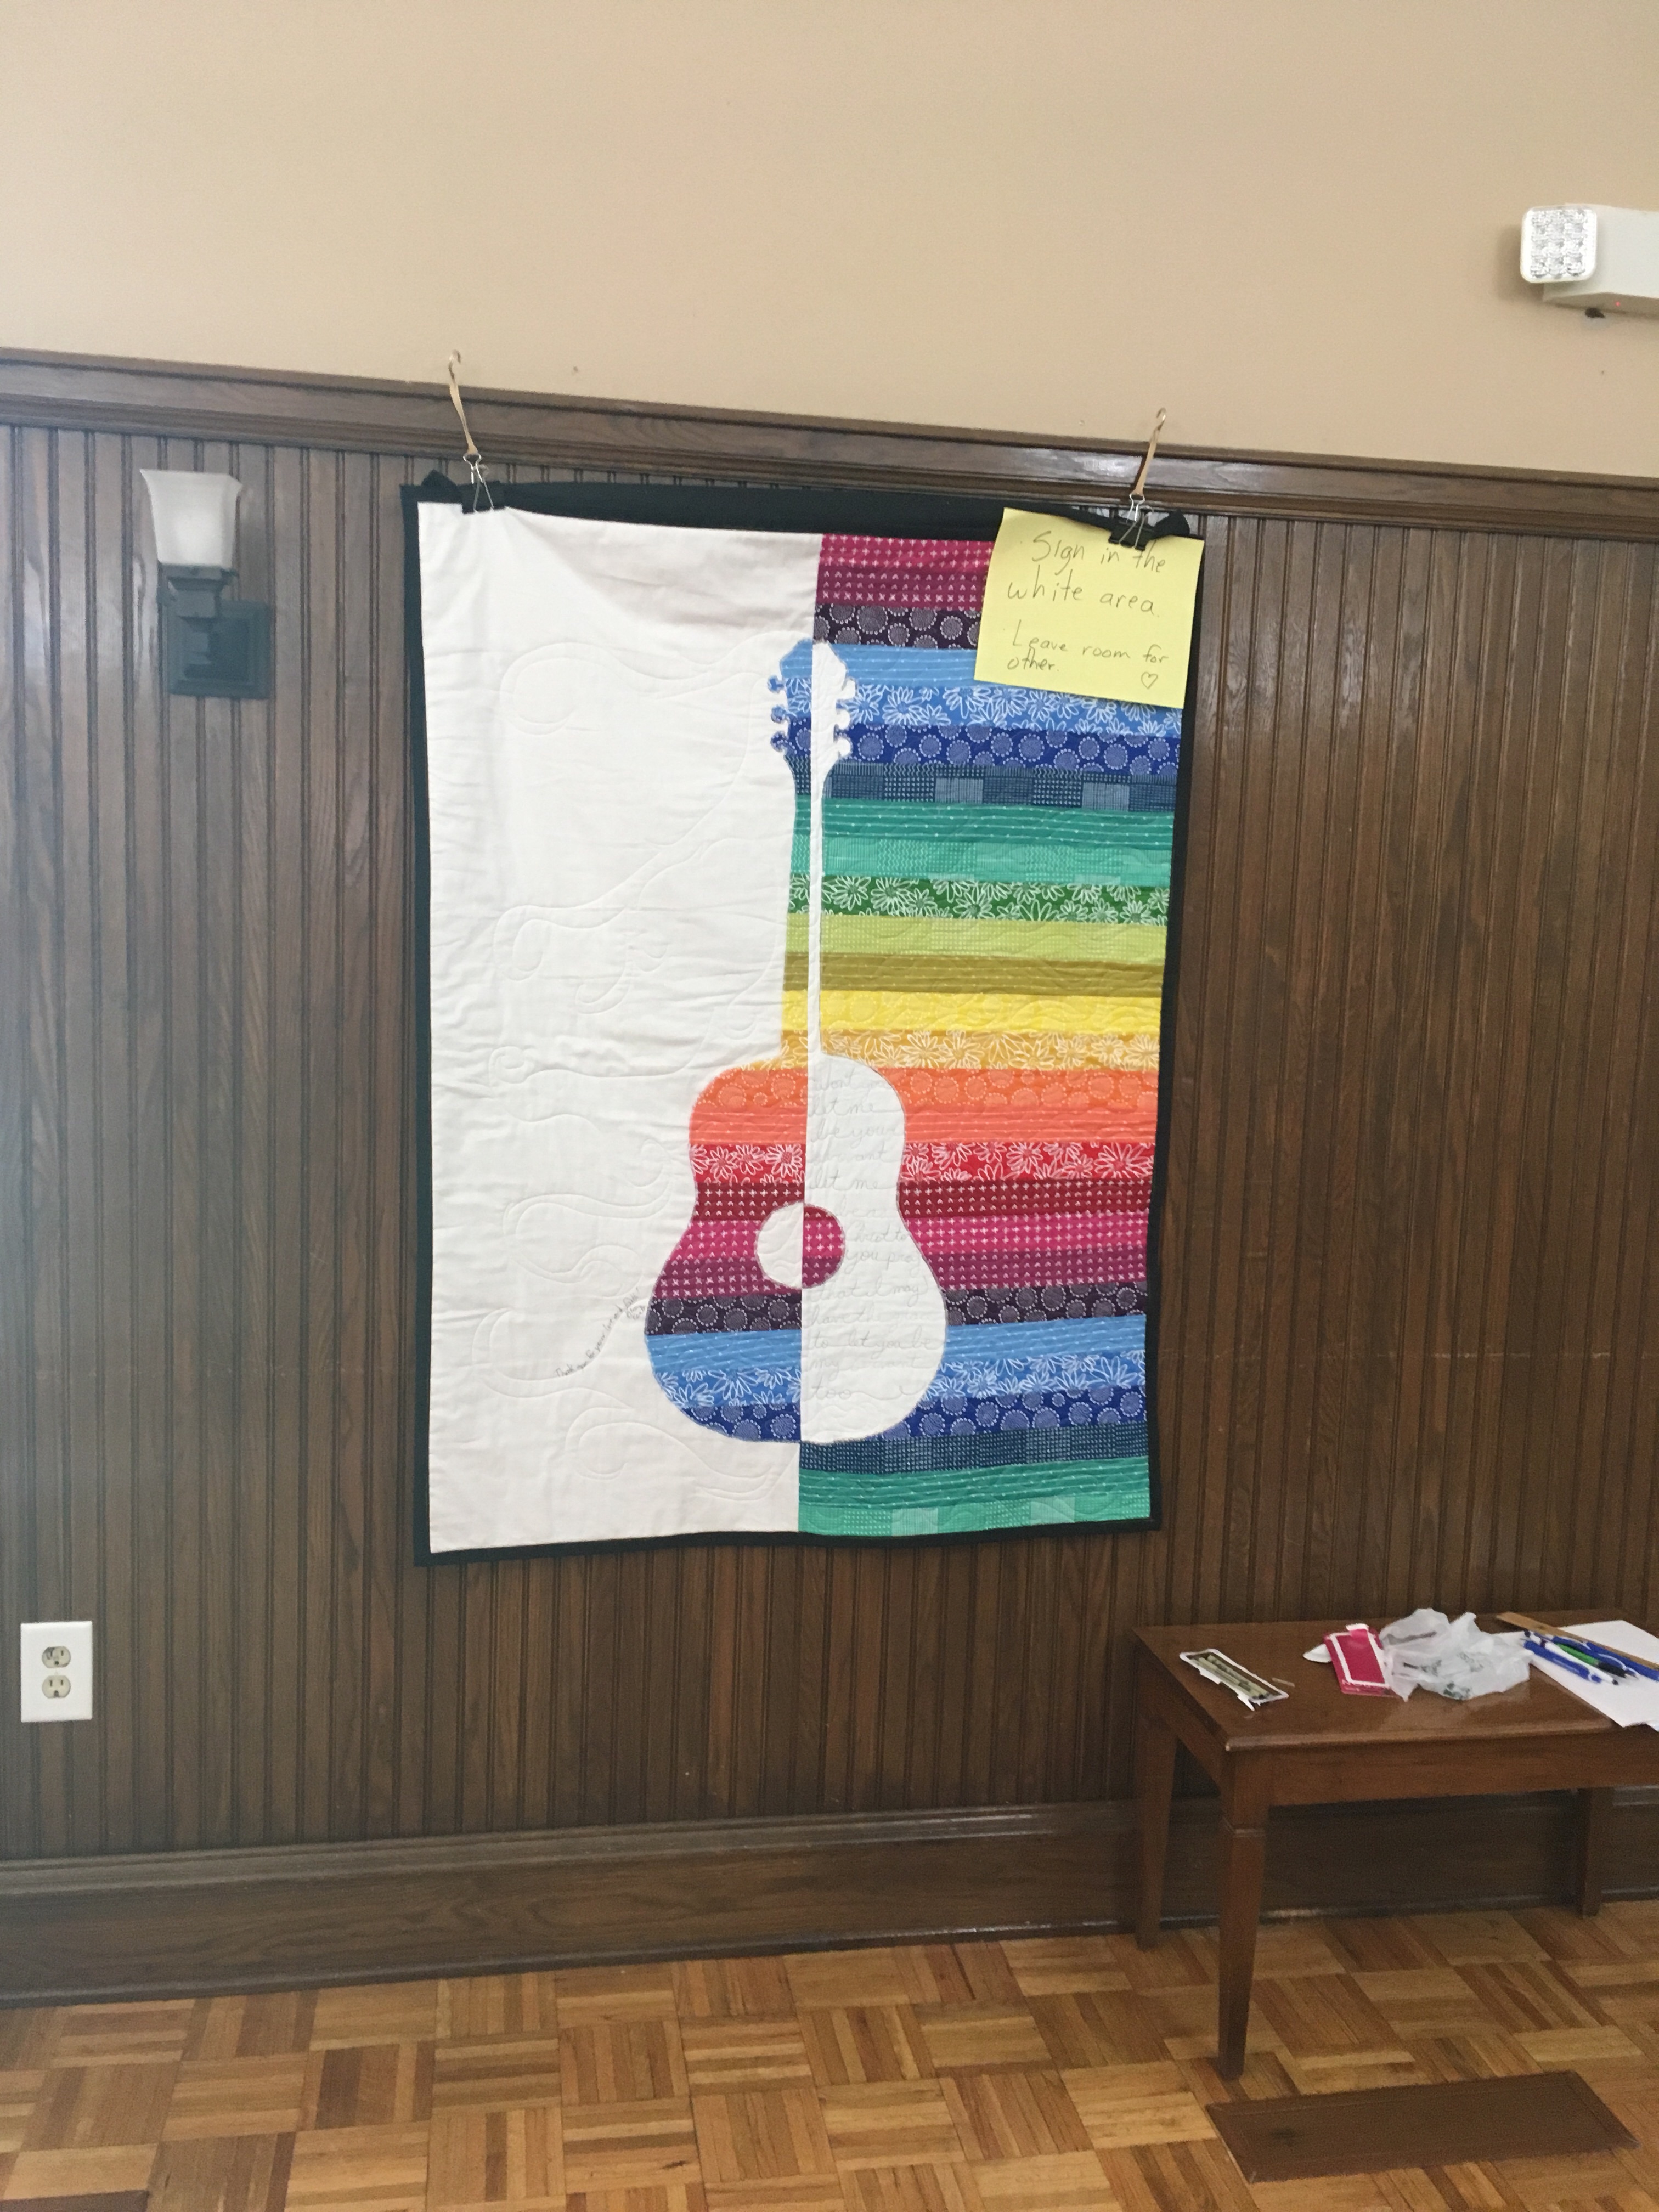
I thought about several options concerning the design, but we all knew it would be for signing in the end. So this meant it would need a lot of light colors or at least a good sized section.
I remembered I had a picture in my Pinterest quilt section that I’d been wanting to try. It wouldn’t take anything to do a different instrument! And what does every self-respecting youth minster play? The guitar, of course! I loved the blog entry that went along with it.
**This pattern is now for sale on Etsy by the original creator! It seems only fair to post a link to the pattern here as well. Violin Pattern Etsy Link
The original inspiration.
I also had a rainbow jelly roll I’d purchased while on vacation with friends in Mississippi. I’d been waiting on just the right project to come along, and this one seemed perfect!
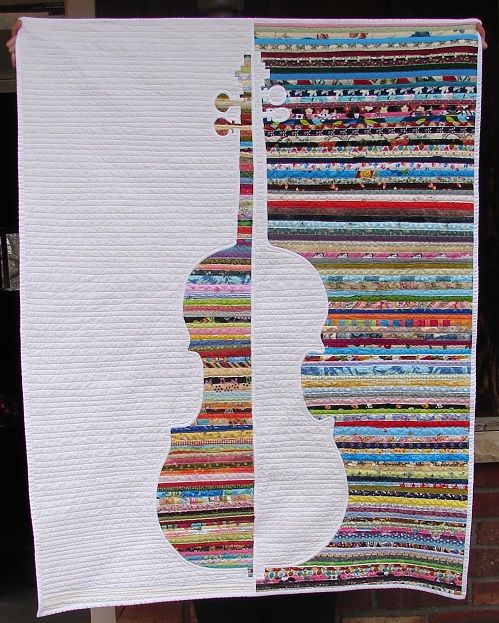
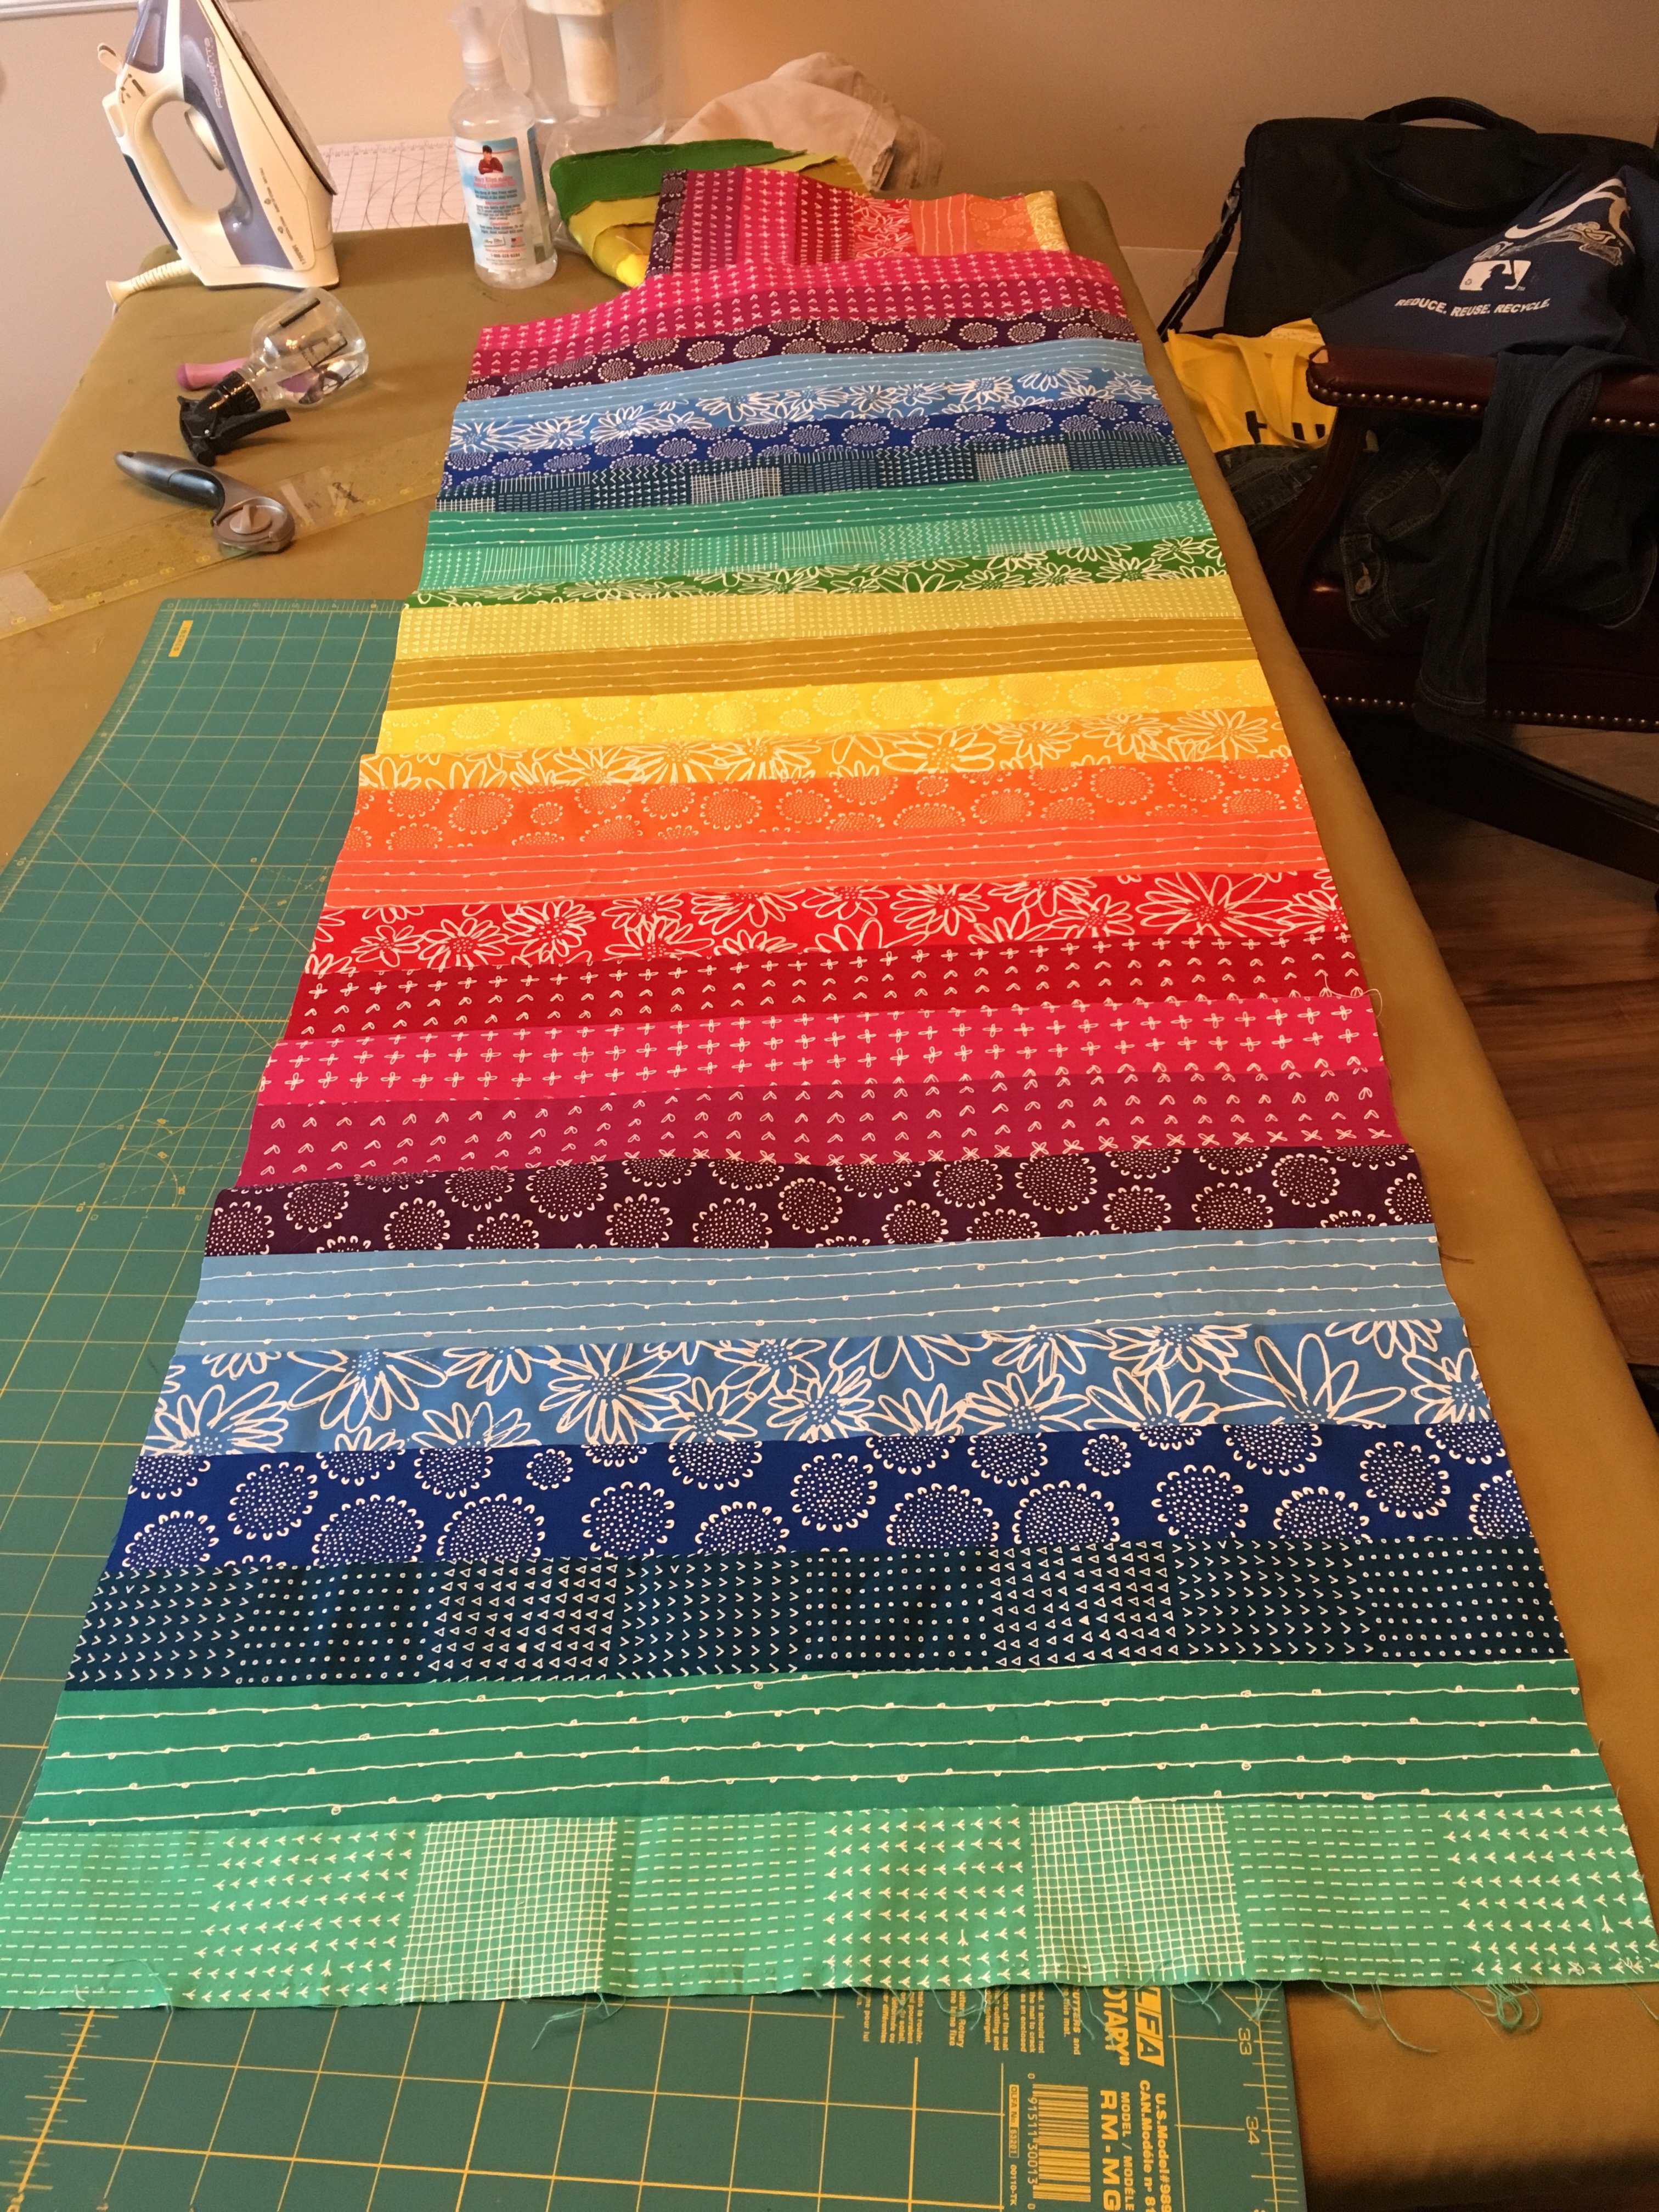
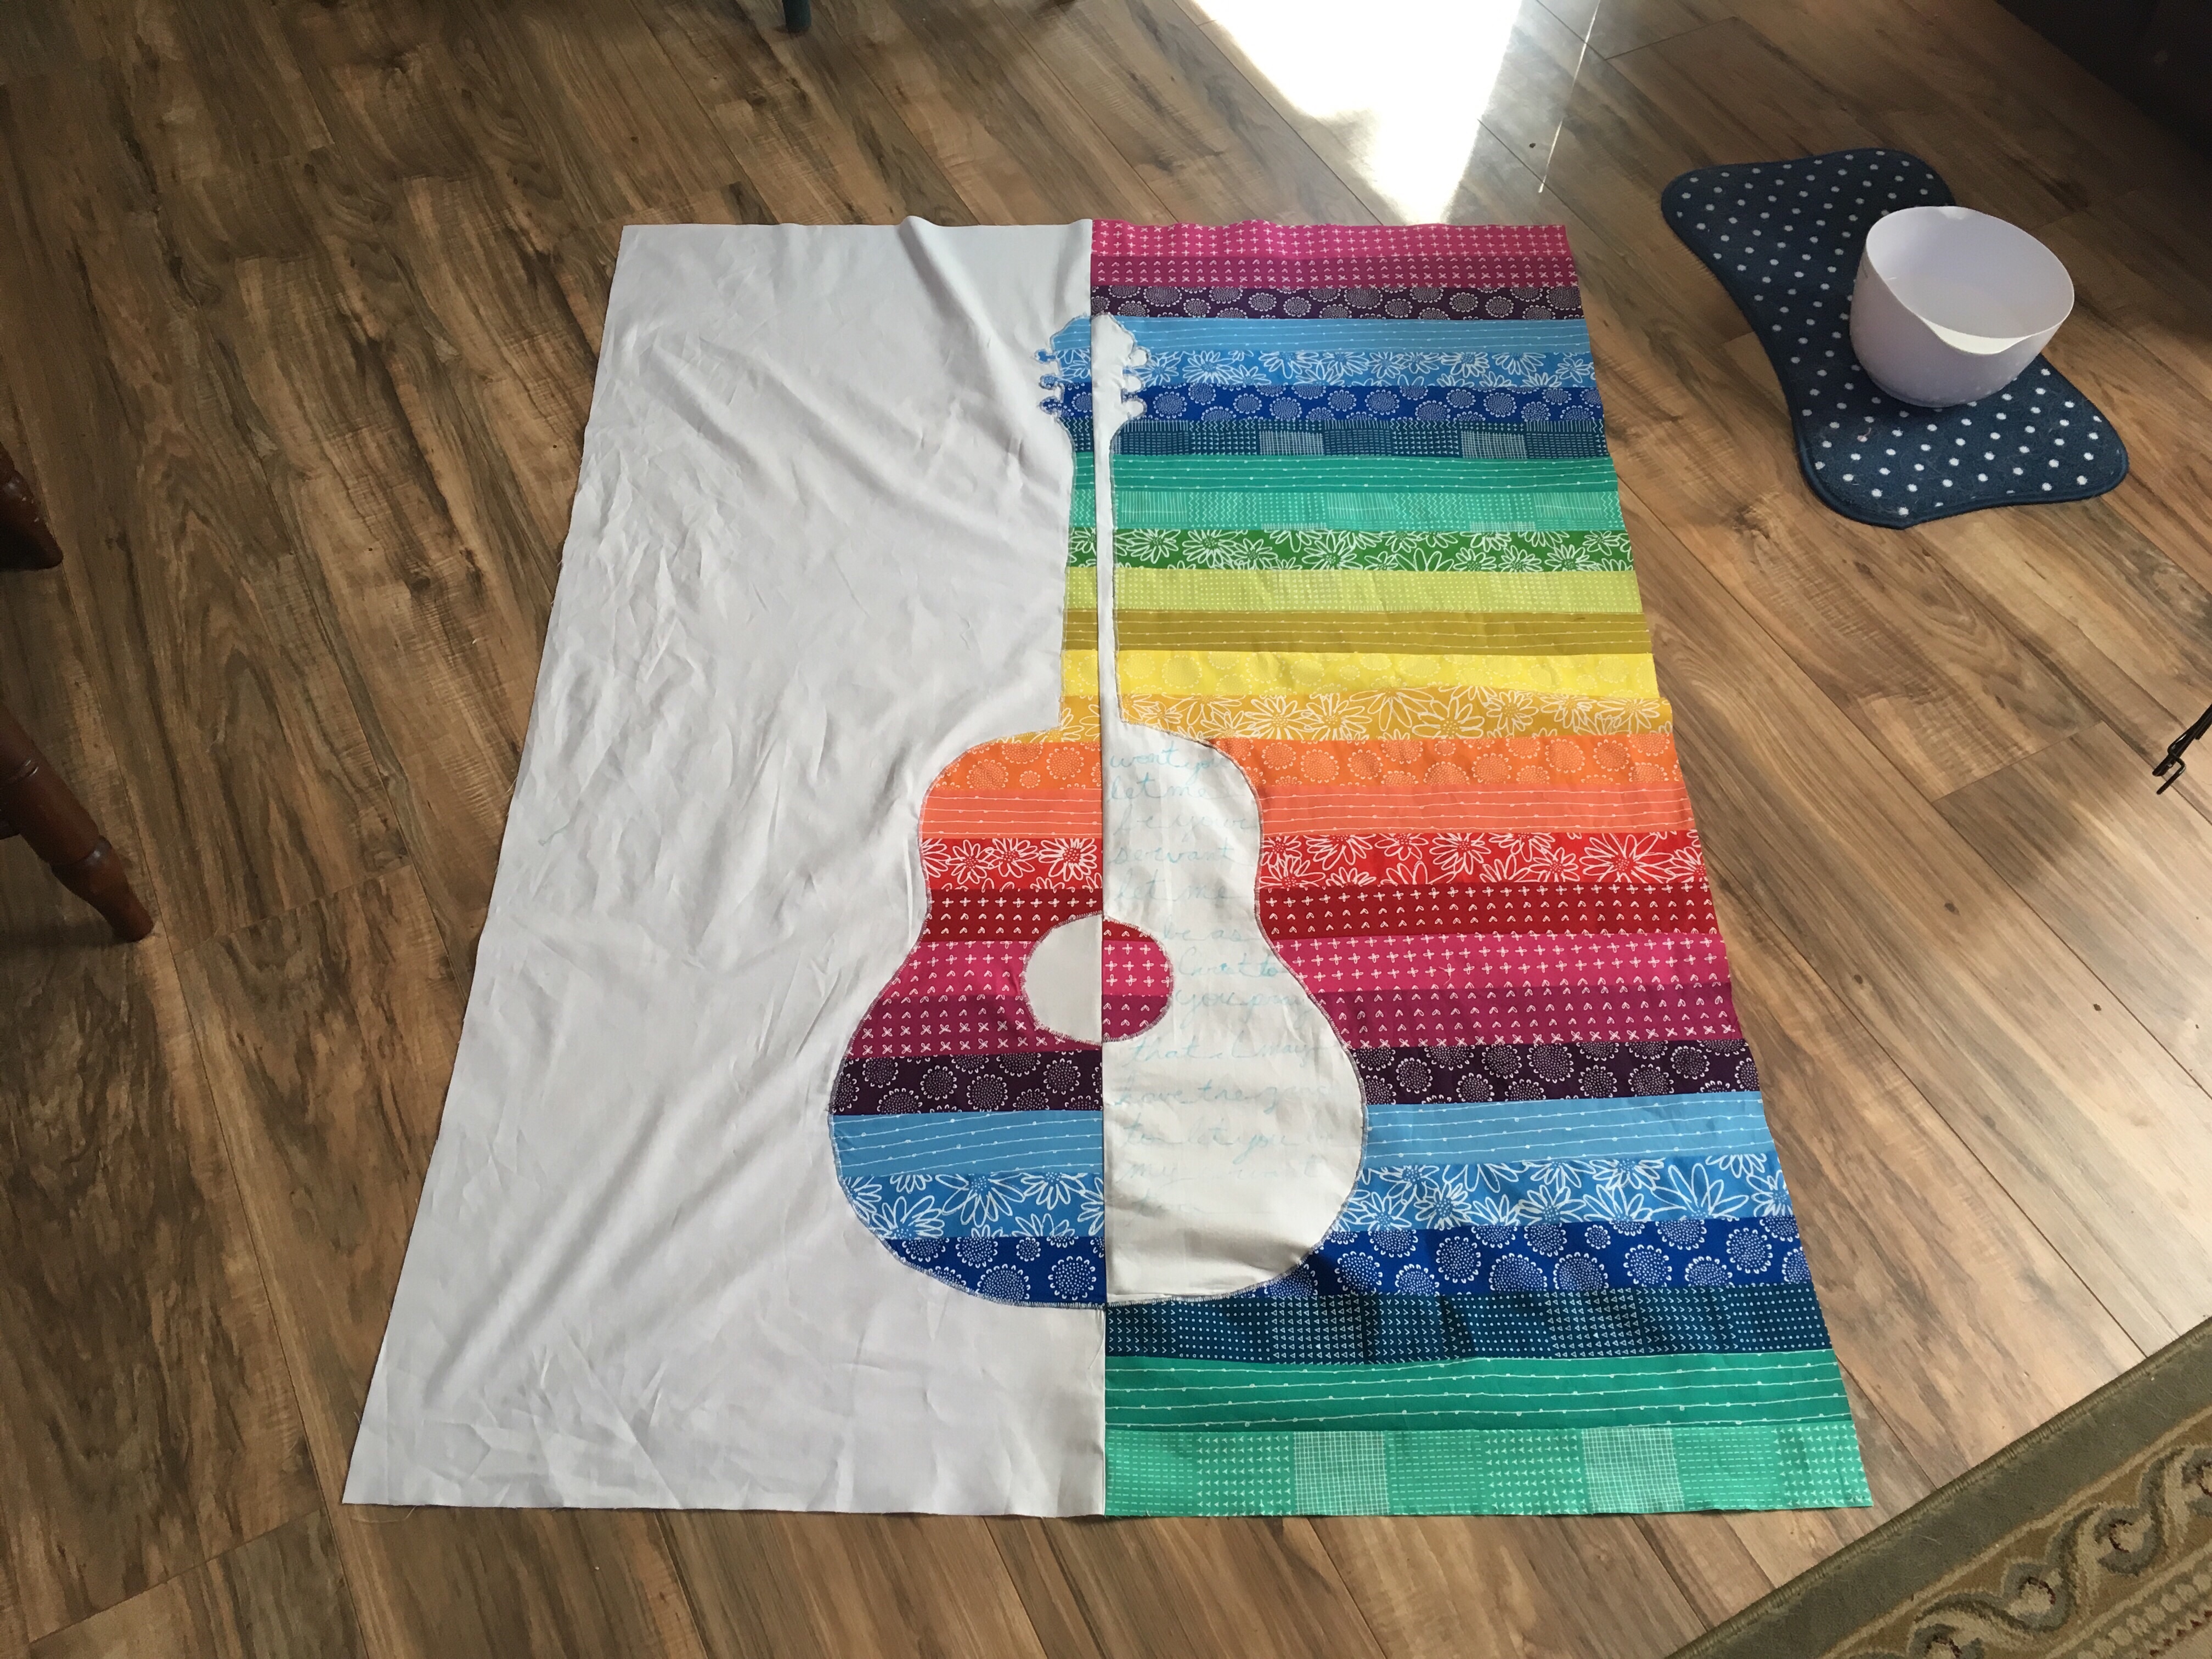
The urge is to think that you can simply cut out the fabric and flip it, but that would have the wrong side of the fabric and the seams sticking out. I had to make two identical columns of rainbows and cut out a guitar shape from each. The cool part is that in doing this I automatically had two quilt tops prepped!
2x
I couldn’t get to my projector at work, so I got creative and taped a bunch of card stock together, traced half of my own guitar, folded the paper in half, and cut out a full sized guitar! I did it this way to ensure symmetry. I am keeping the template as it looks neat and will, no doubt, come in useful for later projects.
The side with the white half of the guitar is made using reverse applique, and the other side is using traditional applique.
The quilting inside the guitar needed to be extra special. There’s a song that is sung at a lot of the youth events, and it was stuck in my head almost the entire time I was making the top. So it seemed a no-brainer that the first verse of that song would be quilted into the white part of the guitar. The song is “The Servant Song”, and I quilted the following in cursive, “won’t you let me be your servant. Let me be as Christ to you. Pray that I may have the grace to let you be my servant, too.” And although I’m a literature teacher, I had to forego the punctuation. It hurt a little.
For the rainbow side where no one would sign, I really wanted to do some type of vine or tendril look. I did a faint tendril on the white side as well because it needed some type of quilting to ensure it was sturdy.
After that, I did my usual wrap around binding technique and used rainbow thread. The final step was to add a hanging sleeve.
We presented it to her this morning and hung it up at the reception for everyone to sign.
This is another senior quilt I made. It was from her softball jerseys and shirts; she had been playing softball most of her life. I met with her mother, and one of the first things she told me was that her daughter was a “girly girl.” We used this info to look for the backing. We wandered over to the pink fabric section and saw some lined rainbow fabric. It looked alright, but there was something about it that didn’t quite fit. It was right about then I pulled at another bolt and noticed that it was rainbow as well - a mottled one that moved in a gradient. As soon as I pulled it out, the mother and I knew we had struck gold.
Rainbow backing
It remains to this day one of my favorite backings! And I don’t think I’ve seen that fabric since. Pity. I would buy the dang bolt if I could.
As I was working on it, I had an idea and asked the mother to send me the earliest picture they had of the daughter playing softball. She sent me a precious picture, and I laughed when I saw it because the daughter still made that face.
This was a picture of her early years in softball.
The last step was to make her name. I made each letter match one of the jerseys on that same row. I specifically went out and bought zebra print fabric for the “I”. I haven’t used the rest of it and still have it floating around my sewing room.
Would you like to know a secret? You see the rainbow quilt that’s at the top of every page? It’s for sale. It’s been on my Etsy shop for a while, and it gets a lot of attention at my craft fairs. But no one has stepped up to take it home. Here it is.It has sold!!
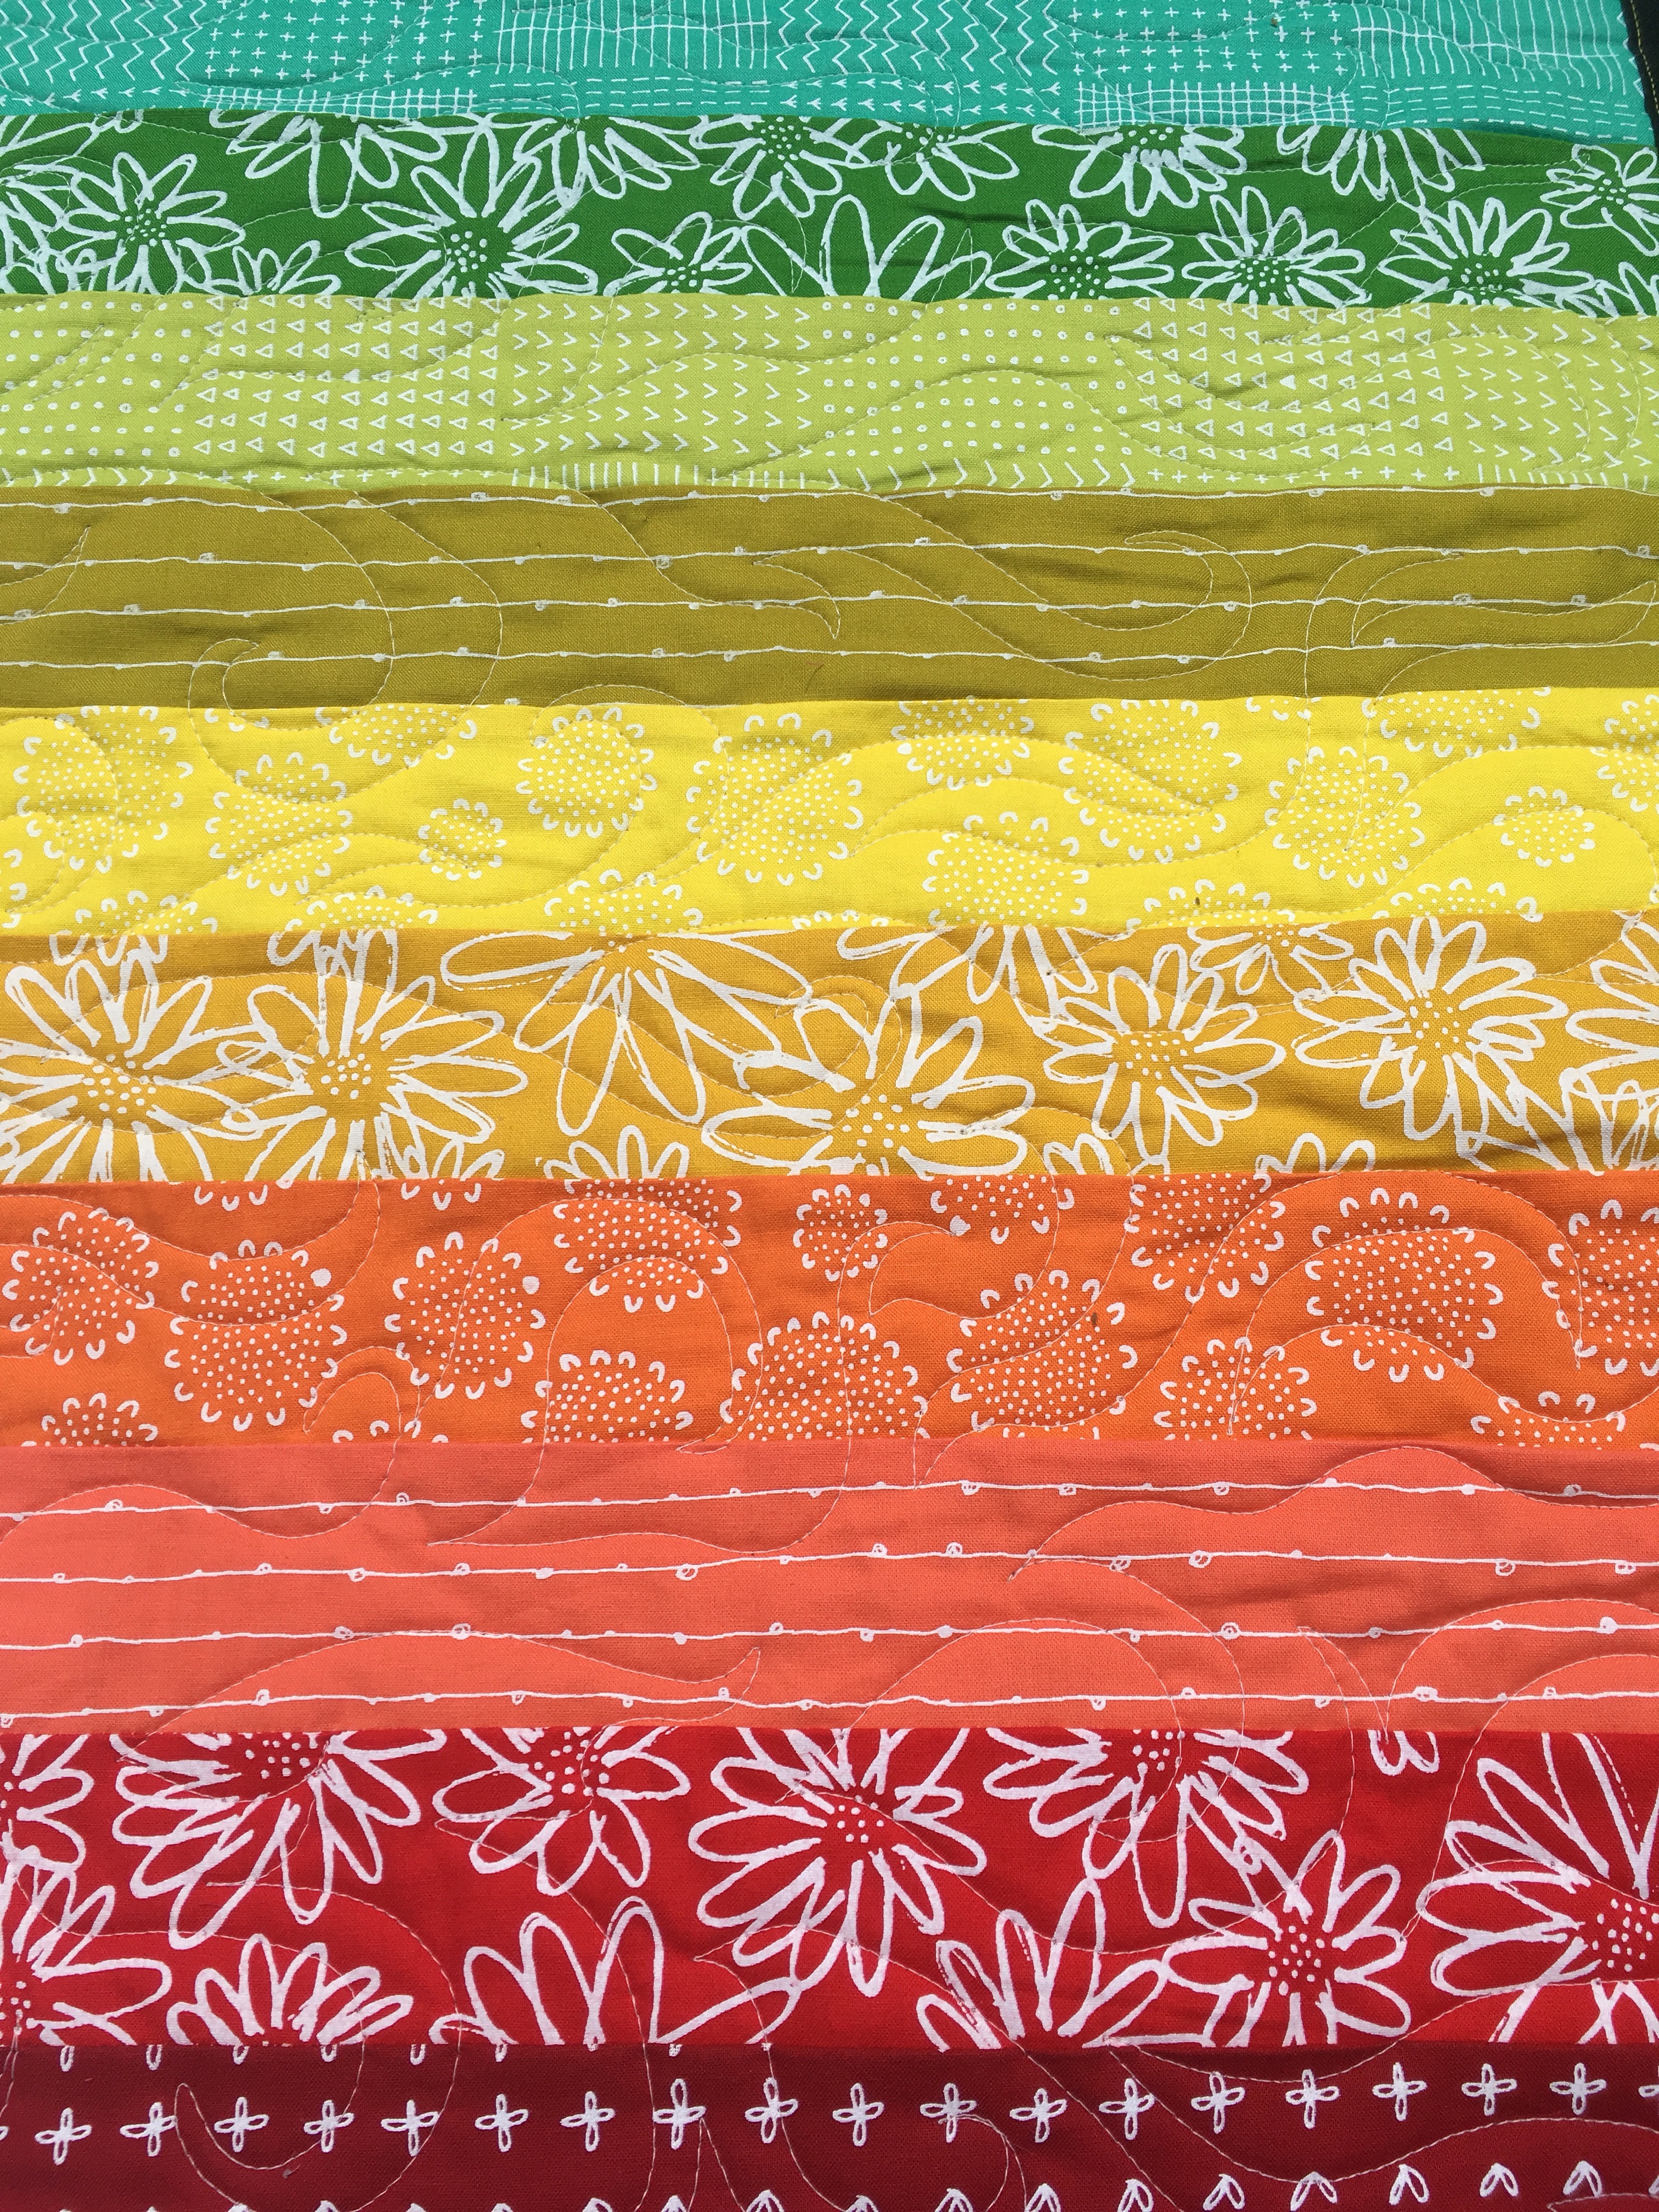
I’ve always considered bargello quilts to be particularly impressive. Seriously, they’re like a fabric kaleidoscope! I had also considered them out of my league, so you’ll imagine my surprise when I found a nice tutorial at the Lets Quilt Something blog that made them not look scary at all! In fact, the tutorial helped me make the decision to finally give it a go.
I wasn’t using a jelly roll (pre-cut fabric strips), though. I had so much fabric in my stash that I couldn’t justify it - although I did have to go out and grab some orange fabric before everything was said and done.
After cutting and joining strips for forever, I followed the tutorial exactly as described. It worked beautifully! (I won’t say without hitches, but those weren’t the fault of the tutorial.) I had so many little strips of fabric that I had to use my cork board and pin them up in order.
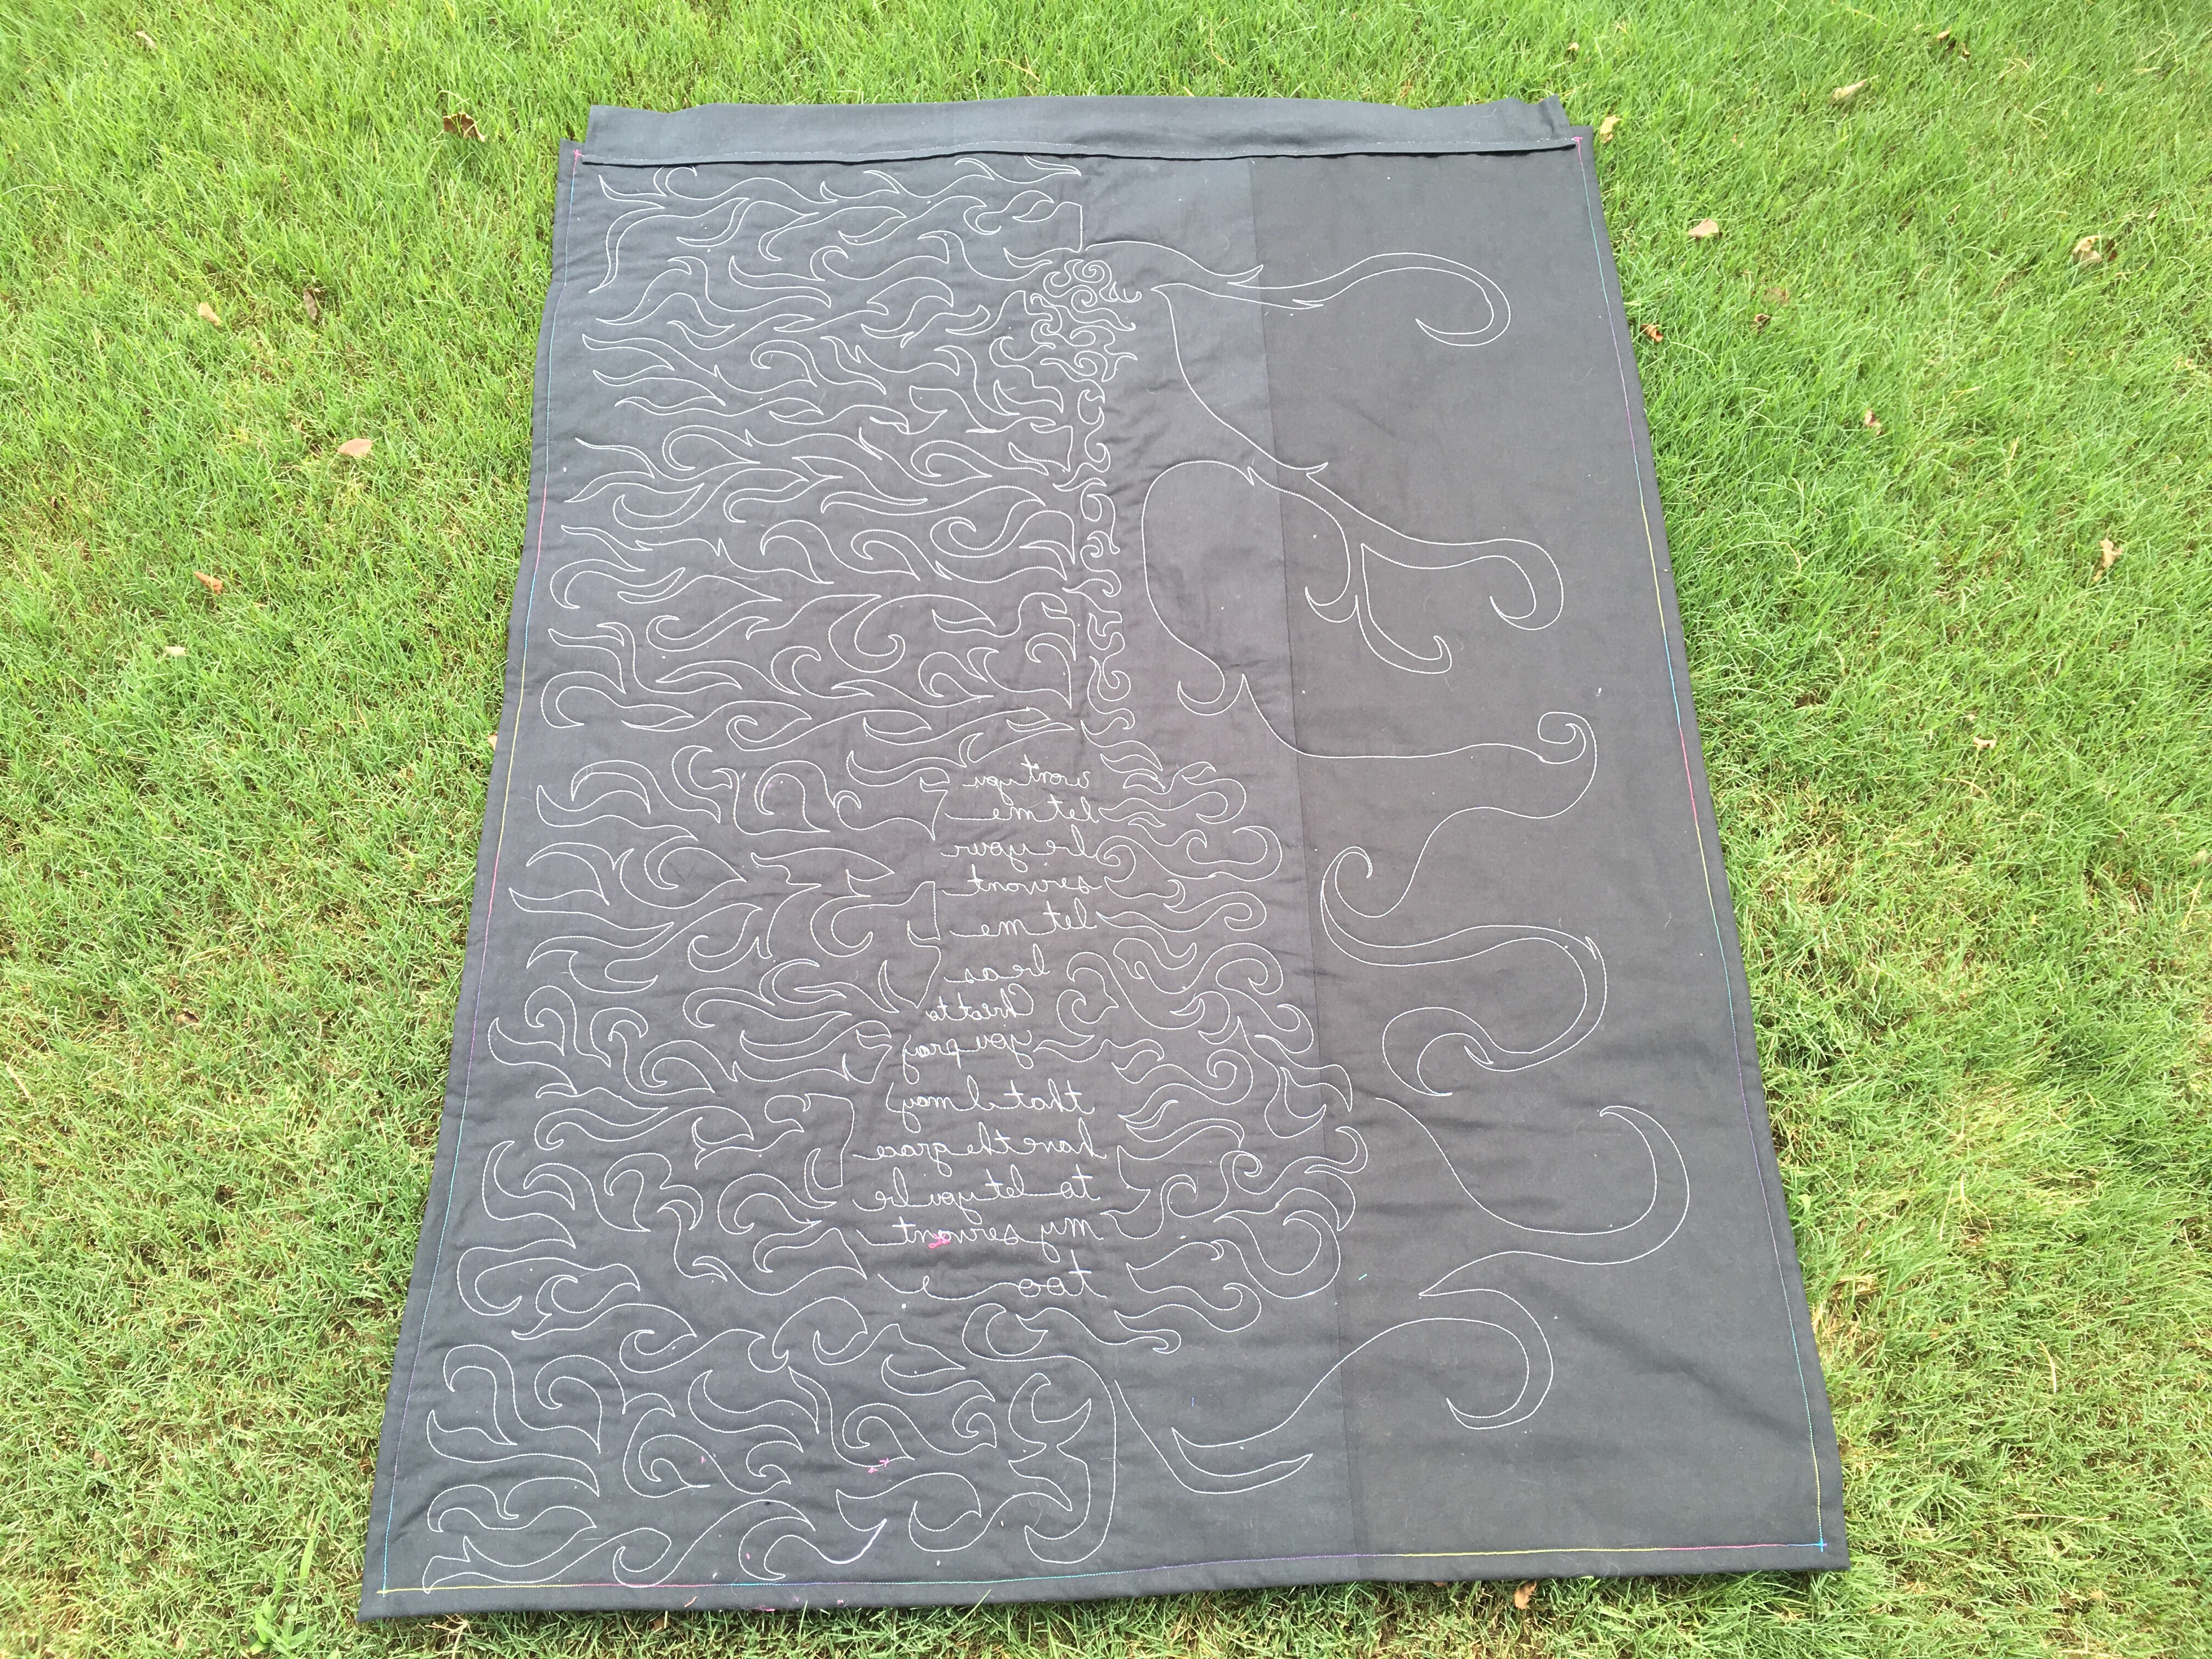
I finally saw the top starting to come together, and I really liked what I was seeing. Once the top was completed, I was at a loss on how to quilt it. I did NOT want the quilting to take away from the top design, so I knew early on I’d probably have to switch out thread and such. But unlike some of my other projects, I swapped out the thread in both the top and in the bobbin. This would make for a colorful design both front and back.
The quilting design came from a sort of challenge from my sister. She was with me at my second craft fair and commented on how I had no other quilting designs except for stipples and loops. She asked if I was capable of anything else. Well, I decided this quilt would be there I showed her what else I could do. I quilted FLAMES!
It took forever.
It’s by far one of my favorite quilts, and I even entered it into my church’s talent show in the craft talents section. Several times I’ve thought about just keeping it for myself, but I’ve kept it up for sale for some reason. I’m hoping someone else can see how much work went into it and can appreciate it for what it is. I do plan on making another one in the future, but I’ll probably cheat and just use a jelly roll next time.
Hi everyone and welcome! This blog is the partner of my Facebook business page: www.facebook.com/questquilts. Here I plan on discussing my favorite hobby, quilting, and all the facets of it that make it such a beautiful art form. I’ll also document projects and such as I explore new methods and create designs.
A rainbow bargello quilt I made a while back and couldn’t resist taking a picture of it in the snow.


You must be logged in to post a comment.