

I have made a lot of bib and burp cloth sets over the Thanksgiving Break in anticipation for my last show. I figured I’d post some pictures below. Prices listed in the picture caption. Please add $4 for shipping. If you’re interested in one, email me about it at the new email address: [email protected].
Tag: baby

Newest item - bibs and burp cloths
A friend of mine is expecting, and I was going to buy her a bib set as a small gift. But as I looked through the shelves over at the baby store, I just didn’t see anything that really struck me. So I finally told her I’d just go home and make one for her. I wanted to make her the kind of bib I would have loved when my kids were babies - a terry cloth back. I bought a gray towel from the store and headed home. From that towel, I was able to make 2 burp clothes and 4 bibs using a gray woodland themed fabric. I loved it, actually, so I decided that this could be another way to use some of those awkward-sized pieces of fabric. So I bought some terry cloth from JoAnn’s, but most of it came from cut up towels I’d bought.
I really got in to making them and worked on the bulk of them while watching Stranger Things 3 with my husband. I even put him to work turning them right-side out.
I’m happy with how they all turned out. I decided to stick to cutting up cheap towels because the terry cloth on the back had more plush than the terry cloth off the bolt at JoAnn’s.


Share this:

Woodland Creatures Baby Quilt

This quilt was for a friend as a surprise at her baby shower. I knew we wanted to tie in to her overall theme of woodland creatures, and I did several searches for different images. In the end, I went with the images on her actual shower invitation. (She loves sloths, so we snuck in one of those as well!)

I traced the images onto basic copy paper and then retraced them backwards onto fusible interfacing.

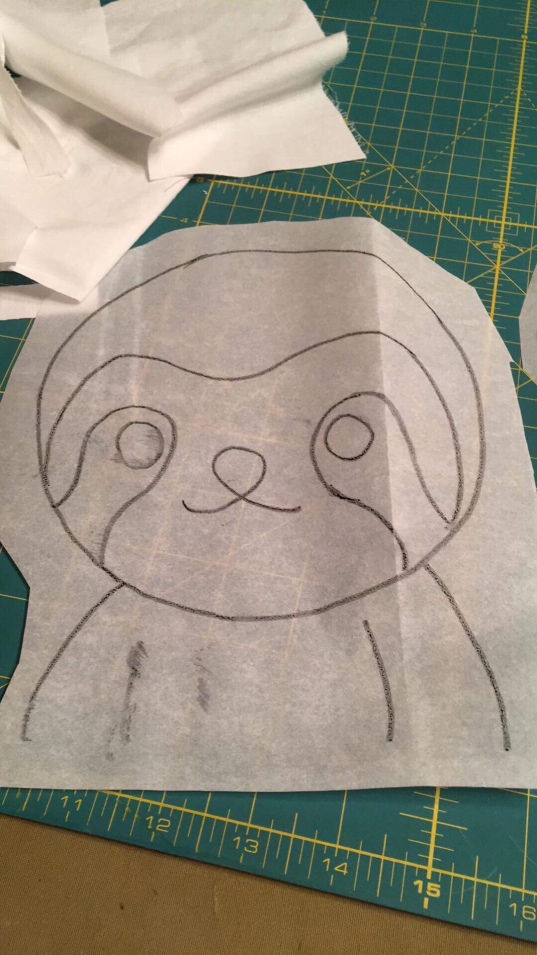
From there, the layering process began. I had to trace each layer backwards onto the fusible interfacing as well and then iron them on top of one another. I’ll admit there were several times here where I thought of different ways to simplify, but in the end it just wouldn’t do. The fox was simplified accidentally, but that was about it.


From there, I ironed them into place and used a large mushroom top to hide their bottoms behind because the original images were cropped as well. It look some rearranging before I finally hit this layout.


Going back and adding in the white “light spots” on the eyes was one of the best moves I did. Before that, they looked cute but kind of flat. They had a deadpan look that kept them lifeless. The sloth, especially, looked somewhat stoned.
And one again, I added a close-set zigzag stitch to finish off the applique elements.
The reason everything was right at the bottom was because we intended for people to be able to sign the quilt with well-wishes for the new family.

What a fun baby quilt this was to make!

Here’s a video of the sweet soon-to-be parents receiving their surprise!
Related Blogs and Posts
Custom Designed Fabrics for a Nature Quilt
Thicket Critter Baby Quilt Pattern
Share this:

Empty Bobbins: The Renn Faire Carney
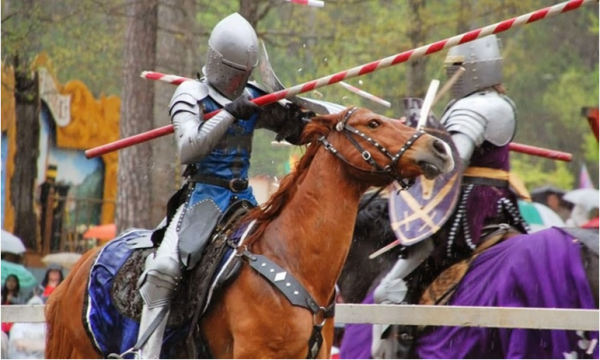
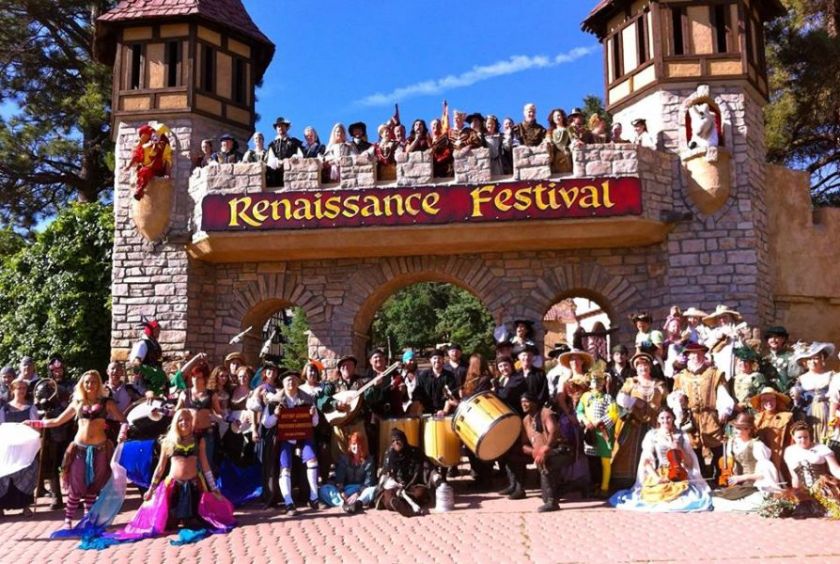
So I love going to the Georgia Renaissance Festival. It’s always fun, and I find some super cool bags and jewelry. This post is about one not-so-pleasant episode years ago. That being said, I’ve gone back just about every year and always have a blast. This year was no exception. But while there, my husband and I were reminded of this story and entertained our friends in the re-telling of it. I thought I’d share with you all as well. Here’s another “empty bobbin” moment for you.
Empty bobbins are moments in life where we pause and reflect. It’s like when your bobbin runs out in the middle of a project, and you have to pause everything you’re doing to reload.
This incident took place about seven years ago when our daughter was about 6 months old. We went to the Renaissance Faire in Fairburn, Georgia, and it was a hot day already. It was also crowded. My husband pushed the stroller over the Georgia red clay of the parking lot as well as the gravel and on in to the actual fair. Once we were in, I took over the stroller duty, and we looked in the different booths as we strolled.
My husband is 6’1”, and I’m 5’ 5.5” (yes, the .5 is important), so it’s easy to understand he’ll often outpace me without realizing it. I rounded a corner, still pushing the stroller, and a lady sitting in the front of a booth to my right called a guy’s name and pointed to the stroller.
I’ll take a time out and comment that it actually wasn’t unusual for folks to point at my daughter while we’re out. She had a large dose of my husband’s Nordic ancestry, and her big blue eyes and fair skin get her a lot of compliments. (She was still bald at 6 months, so her curly blonde hair would come later.)
So the lady pointing to the stroller didn’t really strike me as odd. After all, the Renn Faire folks are supposed to interact with the guests, and they’ll say all sorts of silly things in an effort to interact. Going back to the pointing lady in the booth, I looked over to whomever she called, and a guy working the strength test booth, the one with the mallet and the bell, started walking towards me. He was tall and not exactly fit. He had long, stringy black hair that went to his waist tied behind him in a low-set ponytail and a goatee. He was so tall that it only took a few strides to bring him even with me. As he stopped beside me, he put his pointer finger on the stroller and said, “Stop” somewhat haughtily.

My thought was something along the lines of Okay, not the most polite way to start a conversation, but I’ll play along. What’s funny is that the Renn Faire carnies are the thing my husband likes the least about the Renaissance Faire. I decided to play along in the spirit of the Renn Faire, so I stopped walking and called out to my husband who had accidentally outpaced us, although we were both so engrossed in the booths that we hadn’t noticed. He turned around, and the man with the ponytail beside me raised his arm and hand towards my husband and crooked his finger at him in the “come here” signal. Again, I’m thinking Not exactly polite.
I’ll take another time out to describe a peculiar trait of my husband’s appearance. He has a beard. Not a little, scruffy thing. No. It’s a nice, full, Bob Villa, Viking beard. I love it. And when he’s angry, he bites his bottom lip, making the part of his beard below his bottom lip stick out. I refer to it as his “mad flag.” And when it goes up, you need to back the hell down.
At the sight of this tall, ponytailed man condescendingly signaling him to come to him, I could see from my position several yards away a distant mad flag signaling a warning. In the spirit of Renn Faire, my husband simply replied, “No thank you.” Whew, he chose the path of politeness. We could go.
Nope.
The man beckoned again, and I looked up to my husband somewhat helplessly. Whatever Ponytail had to say had better be feckin’ hilarious, but it wasn’t off to a promising start. In the spirit of Renn Faire – my husband walked over. He didn’t even have time to stop when the guy uttered what would become a family saying for years.
“SHE carried the baby for nine months; the least YOU can do is push the stroller.”
How judgmental could you get? The implications in such a simple statement! In one comment, he’d managed to question both the role of father AND husband. This guy had no idea who we were as a family. For all he knew, my husband could have been suffering from some arthritis incurred from injuries he received from an IED from his days in the service. I could have been trying to get some resistance training in as part of my triathlon conditioning. This man only knew what he saw – me pushing a stroller. He, who probably had neither wife nor child, had decided to take it upon himself to be the Georgia Renaissance Faire Stroller Nazi, and we were a prime target. Except we weren’t. I was married to a Viking descendant. Oh. Shit. At that point, I knew the next move I had to make was in the best interest of everyone. All I could see was my husband’s future mug shot, a bail amount we didn’t possess, and a court date we didn’t have time for.
Nope. Nope. Nope.
I muttered, “Oh, he pushes. He does,” and I started walking, pushing that stroller as fast as I could without outright running. I passed my husband in a few steps, and his gait had definitely increased in vigor as he was approaching Ponytail, mad flag at full mast. I whispered as I passed him, “Let it go.” (Long before Frozen, mind you.) And I kept walking and didn’t look back. Somehow, I was hoping an invisible tether between myself, him, and our infant daughter would pull him along, and he would forsake sacking and pillaging Ponytail and his Test of Strength booth. After a few moments, when I didn’t hear the sound of bludgeoning, I turned around to see him following me, red faced and furious. Whew, it had worked. He hadn’t hit him with his own booth mallet.
Unfortunately, the Renn Faire is in a circle, and my husband’s hackles were definitely up as he spied him through the fair exit. I mentioned something about bail money, and we managed to leave the fair without physical altercation.
I’ll add the disclaimer that the vast majority of folks who work a Renn Faire are really stand up people and fun to be around. This experience reflects our episode with one D-bag.
One good thing that came out of the trip was my daughter discovering the joy of dill pickles.
Related blogs and posts:
Scarborough Renaissance Festival
8 Reasons to Love the Georgia Renaissance Festival
Share this:

Starry Night Baby Quilt
This is another example of the Seattle Streets design. I made this one for a couple of friends expecting their first son. When I learned they were planning on a Starry Night nursery theme, I immediately remembered that JoAnn’s fabrics had a Starry Night fabric that would be perfect. I had planned to completely surprise them. However, at one point, exhausted after not finding what she wanted online, my friend texted me about prices for making something, and I had no choice but to confess that I already had something in the works.
I chose the Seattle Streets pattern once again because it’s a great pattern for featuring a lot of different colors. I used the coordinating colors from the backing and made the top to match instead of the other way around.
To keep with the swirls from the original painting design, I went back to my usual swirl pattern that I’ve used with this design before, using blue variegated thread. In the end, the backing stole the show despite the pretty front.

This was a fun one to make, and I love the idea of a Starry Night themed nursery!
Related Posts and Blogs:
Sunflowers - If Van Gogh Were a Quilter
Houston Quilt Festival - Van Gogh Quilt
Share this:

Seattle Streets Wedding Quilt
This quilt is made from a pattern called Seattle Streets. I found it online at the Caritas Quilts blog. A friend’s daughter was married, and for the wedding reception, they had all these different green and neutral combinations. I have used the Seattle Streets pattern for other projects as well, and I used it to make a quilt for my son and a quilt for my friend’s baby. I like it, and it’s a great pattern when you have a lot of fabric to showcase, especially fabric with little patterns.
The pattern itself does take time, but it isn’t nearly the amount of time that it looks like it takes. The tutorial is excellent! The secret I learned the hard way, and you can see it in the featured picture, is to remember to “square up” your blocks as this pattern can curve easily. I forgot to do this, and with anything bigger than a baby blanket it shows a LOT.
To quilt it, I decided that swirls would balance out all the blocks and such.
I used it again on my friend’s baby quilt - using a pink line between the fabric instead of the black.
The first time I used this was for my son’s quilt. I loved the fabrics I’d bought and wanted something that would look like stained glass. This did the trick perfectly.
One day I’m going to make one of these bad boys using batiks!
Related Posts and Blogs:
Another Stained Glass quilt
Share this:

Disney Princess Silhouette Quilt
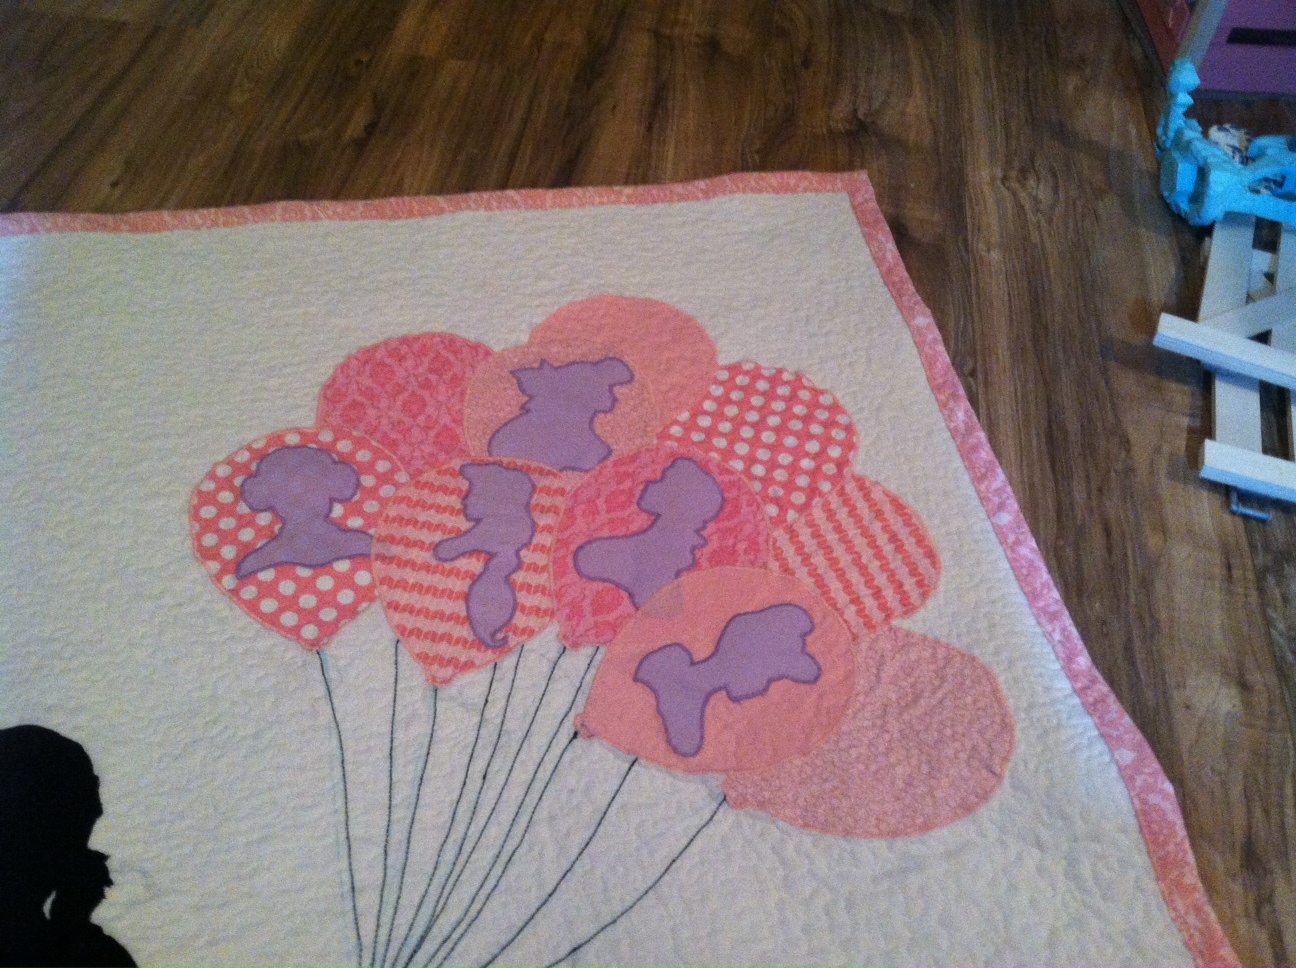
This quilt was made as a surprise for a friend expecting her first child, a daughter. This friend is a dedicated Disney aficionado, and I knew right away I wanted to do something related to Disney. But focusing on one princess seemed…inaccurate. This friend loved all things Disney, so I decided to go for several at once. I sent her a message asking who were her favorite Disney princesses, and she replied back with several. To her credit, she had to have known I was up to something but didn’t ask any more questions despite my strange messages to her.
I’d seen on Pinterest a quilt with a little boy silhouette holding balloons, and I remembered the balloons being a big part of that Disney World experience. I decided to go that route. I purchased several pink fat quarters and made the balloon shapes. That step was easy enough. The girl and princess silhouettes took some more thought.
I looked around at a LOT of little girl silhouettes before settling in on this one. In the end, I picked this one because you could see the cute, wispy pig tails, and it made me think of some spunky girls I’ve known, but you could also tell she was wearing a pretty fluffy and fancy dress. I liked the balance in there and felt that any daughter my friend had would have a similar dynamic.
The princess profiles were easy to find, but they didn’t want to translate to fabric all that well. To be honest, there were a couple of points where I thought the girl was just going to have to hold regular balloons sans princess. It was the lips and chin that didn’t want to work with the fabric and sewing machine, and in the end I took another friend’s advice and simply smoothed out the lips and chin, letting the hair, brow, and nose do most of the defining. For the most part it worked. If you look closely, you can see another princess added in for Daddy - Disney’s newest acquired princess - Leia Organa.
Funny enough, one part I was having to focus pretty hard on was the strings. I couldn’t, of course, have real strings hanging loose. That wouldn’t be very durable, and this quilt was for a baby, making them a safety hazard. So I decided to use an extra wide stitch and keep it simple. I wanted to make sure the strings looked natural and relaxed like they can with actual balloons. I was relieved when they turned out well.
This quilt was a first for me in another technique as well. I used a pink bobbin and black top thread while quilting the silhouette. The backing was such a pretty pink that anything distracting from it would have been a shame, but the black silhouette also needed to stay clean, so I held my breath and gave it a go. I was so thrilled when I realized I didn’t have to chose between ruining my top or backing!
After all that I quilted it together with a small stipple pattern. I’m happy to report that the quilt gets regular use!
Related posts and blogs:
My definitive ranking of [almost] every Disney Princess


You must be logged in to post a comment.